Blueprint Definition
A Blueprint in the Trustwise portal is a configuration template used to optimize AI models based on user-defined settings. Blueprints streamline the process of running Optimize:ai scans, ensuring consistency, compliance, and efficiency across scans while allowing flexibility for specific project requirements.
Benefits
- Efficiency: Simplify scan setup.
- Consistency: Maintain uniform configurations.
- Flexibility: Modify blueprints for evolving needs.
Overview
This guide provides instructions for creating and customizing Blueprints, including accessing the Launchpad screen, configuring parameters (workload, controls, models, data sources, and others), and managing existing Blueprints. Effective Blueprint management helps generate tailored reports and optimizes workflows.
Let's walk you through how to create blueprints.
Step 1: Access the Launchpad
Start by navigating to the Launchpad.

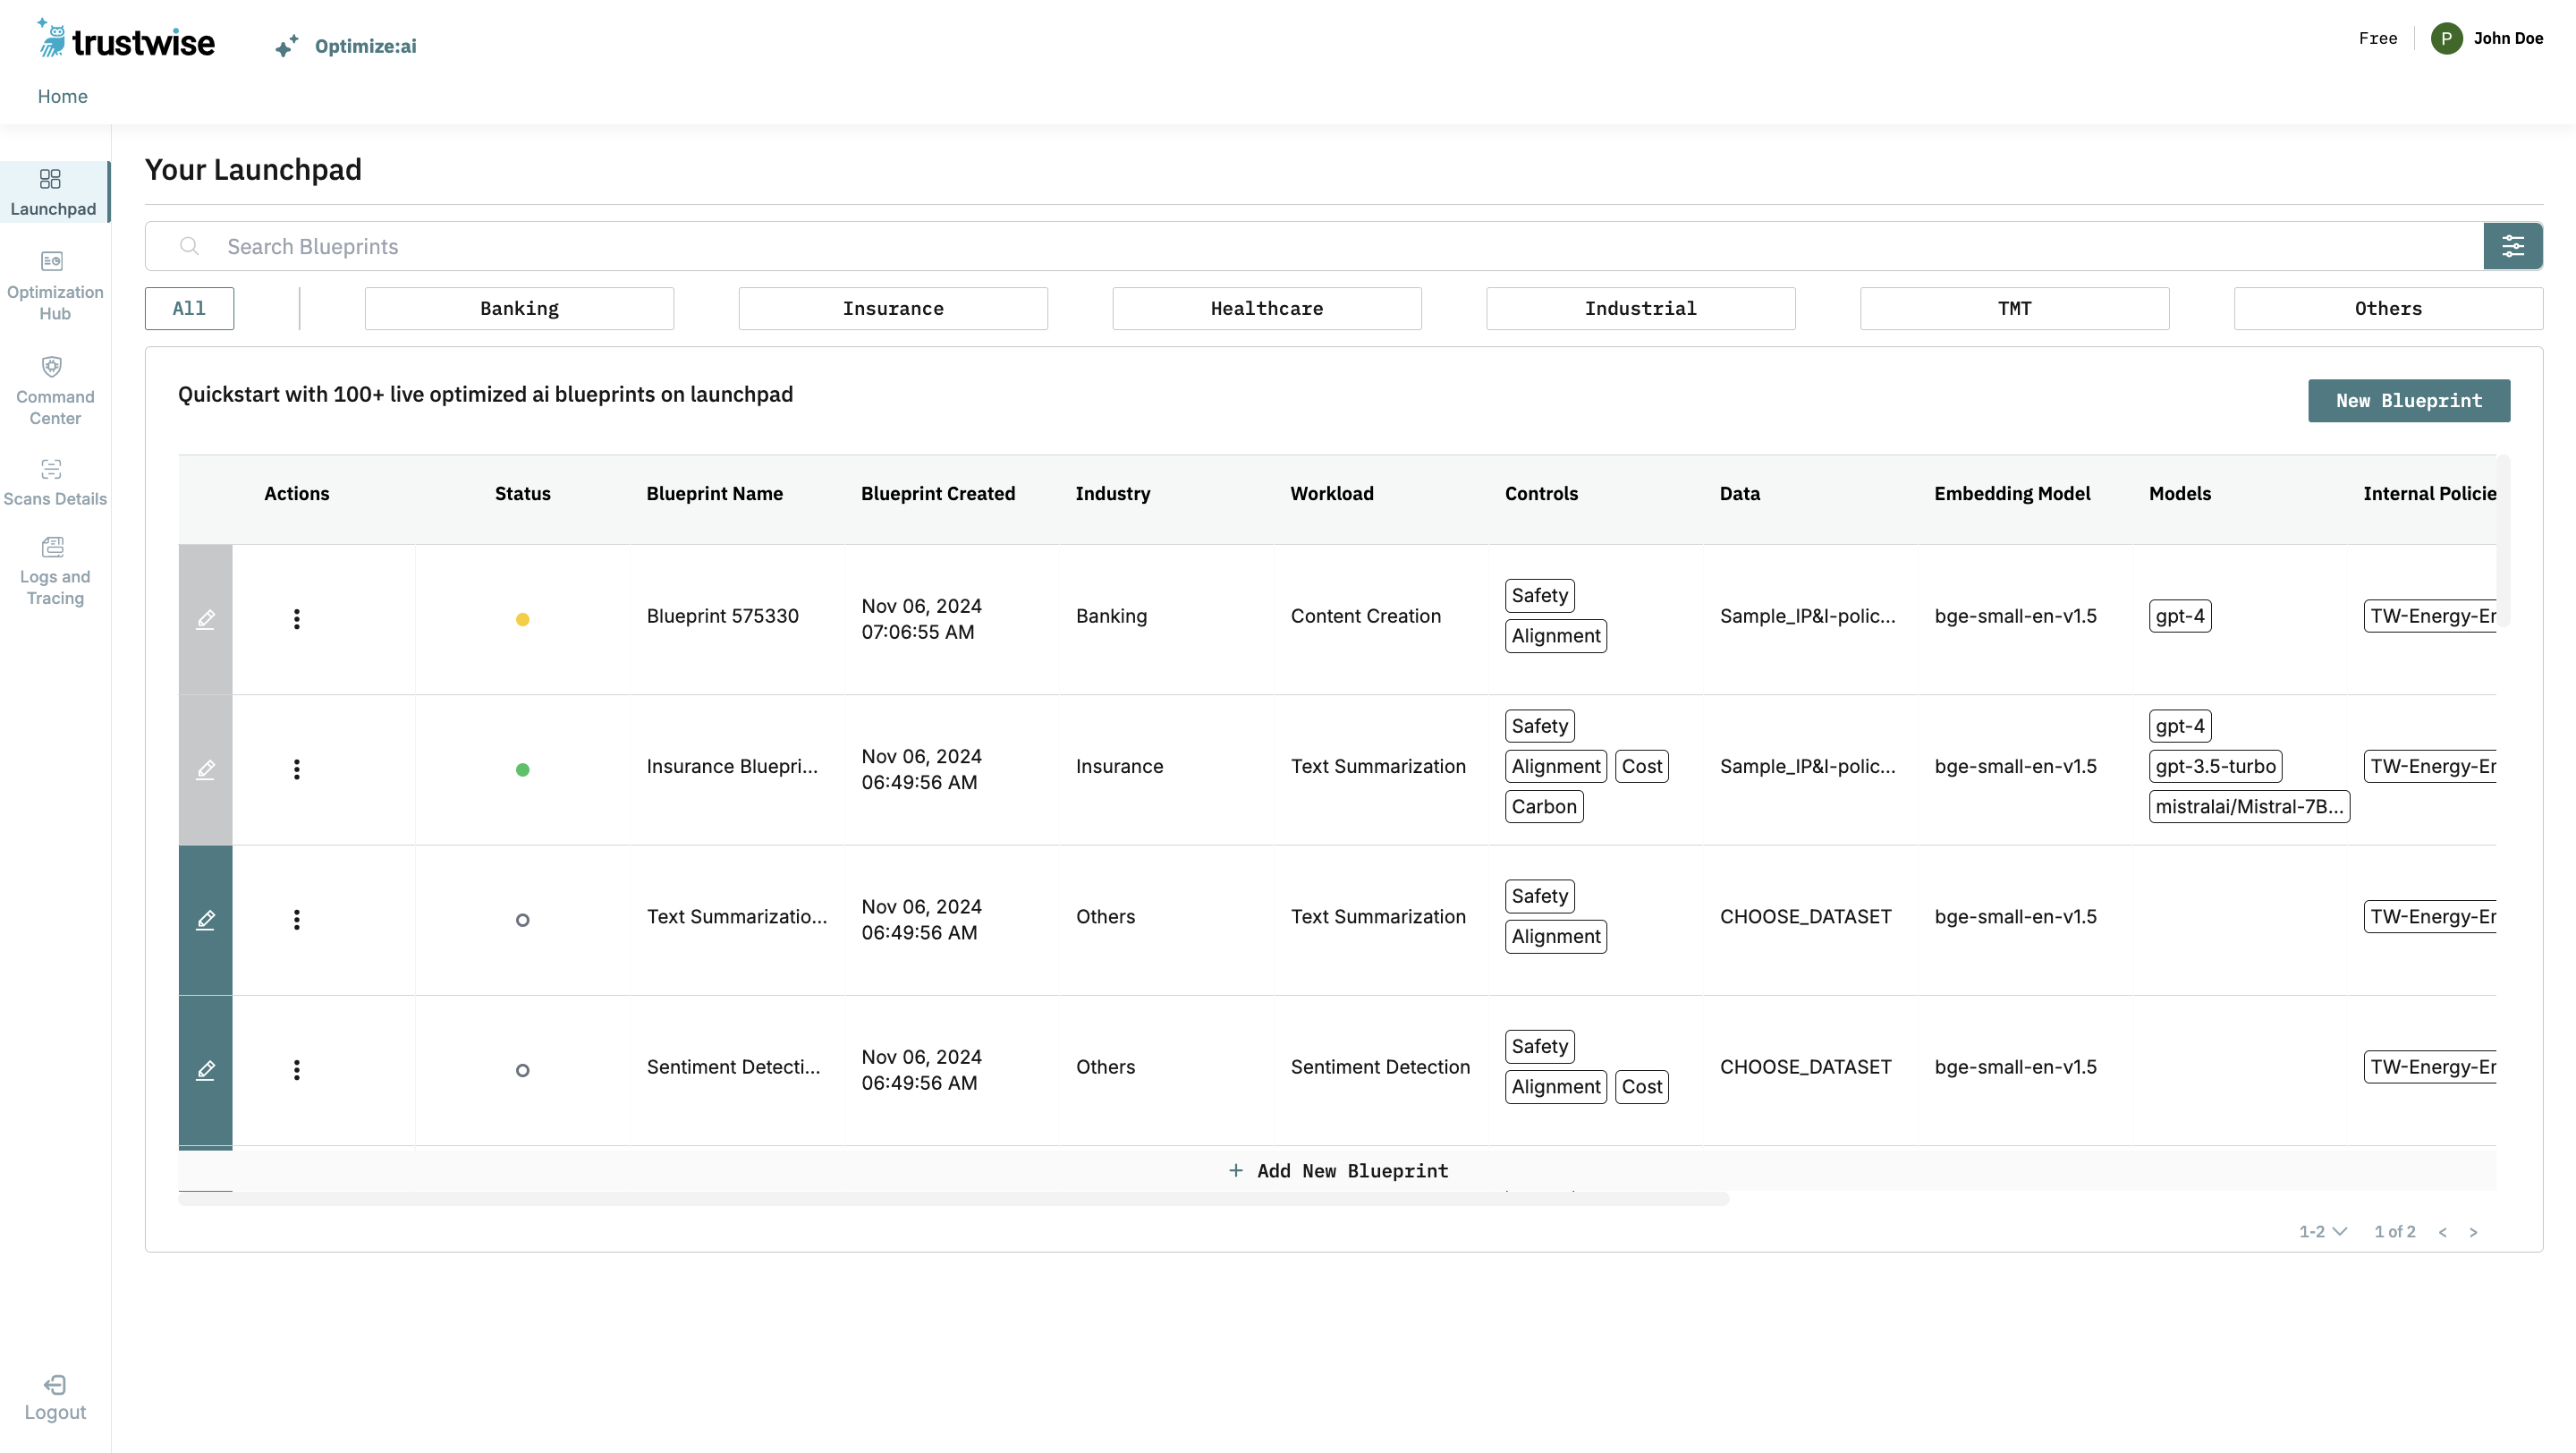
To create a new Blueprint, first select the "+" Add New Blueprint icon at the bottom of the table or the New Blueprint button in the top right corner. Then, fill in all required fields in the editable row that appears and click the checkbox button on the left to save the blueprint. Note that blueprint creation is not possible if any mandatory fields are not filled.
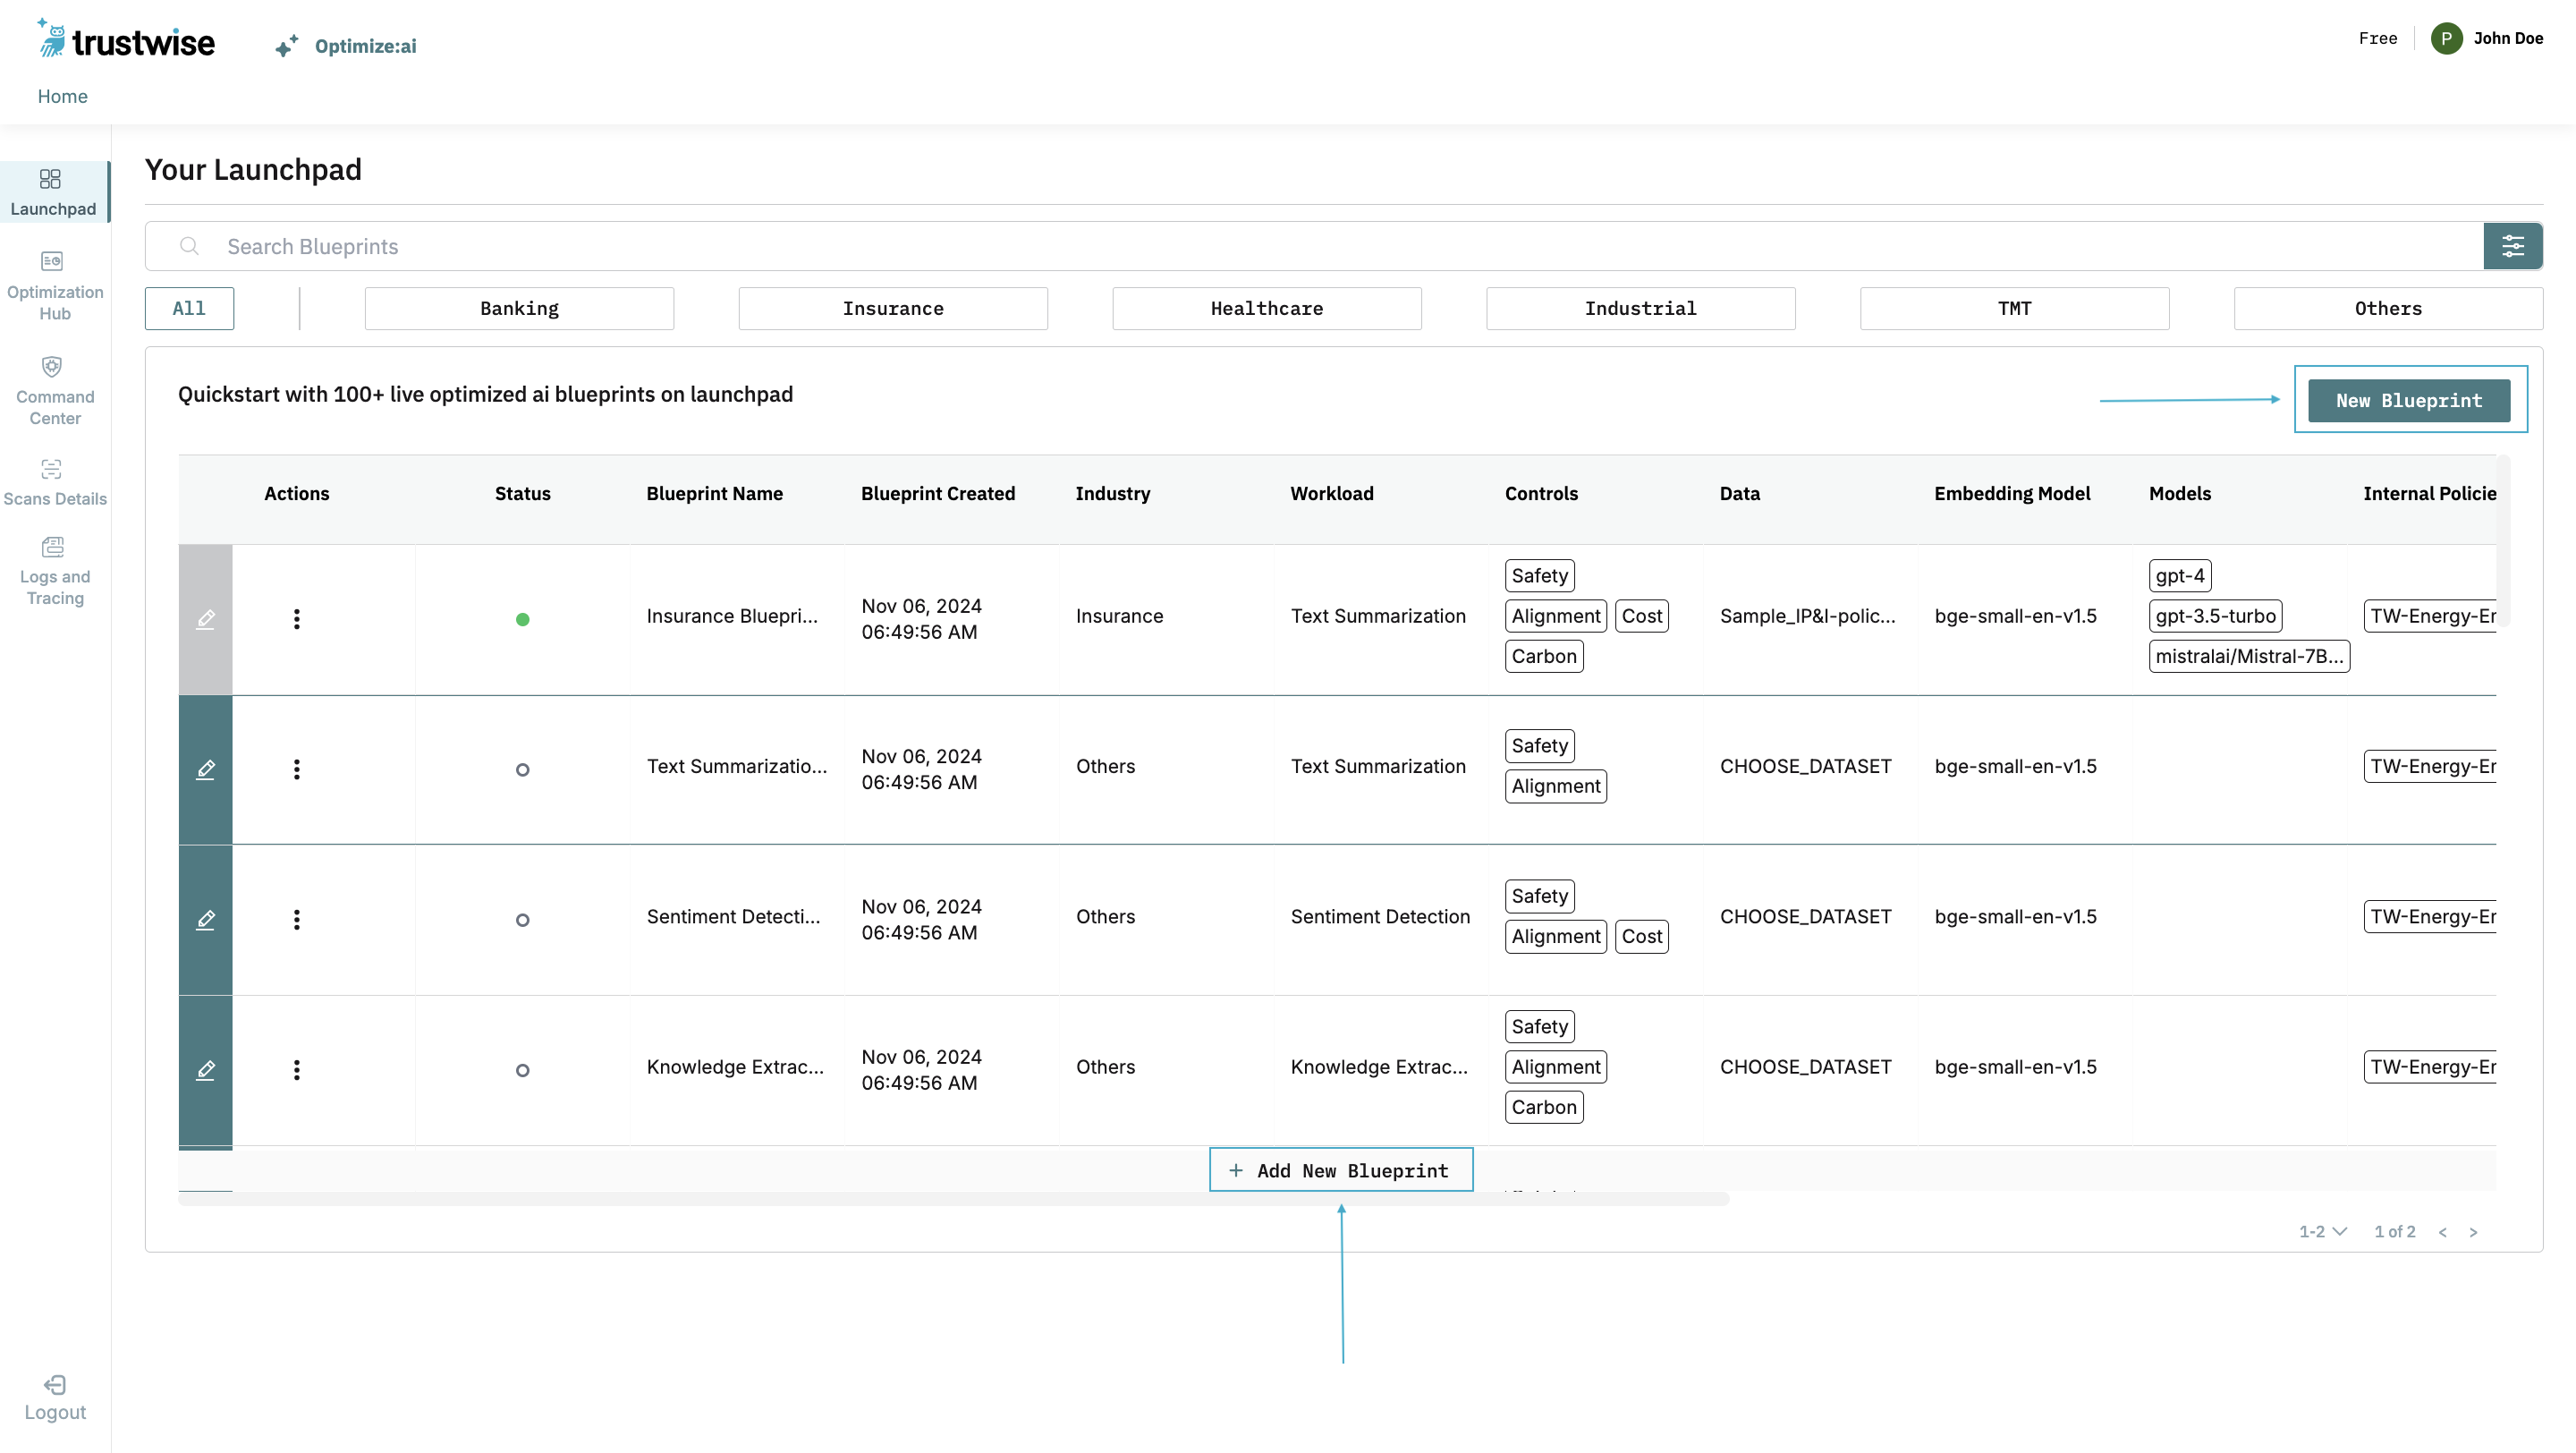
Step 2: Entering Blueprint details
Industry
Select the appropriate Industry type from the drop-down menu. This helps optimize the model's performance based on sector-specific challenges.
The available industry options include:
- Banking: For financial services, focusing on tasks like fraud detection, customer support, loan approvals, and transaction analysis.
- Insurance: Tailored for risk assessment, claims processing, underwriting automation, and customer service within the insurance sector.
- Healthcare: Focused on patient data management, medical diagnosis support, electronic health record (EHR) analysis, and medical coding.
- Industrial: Suited for manufacturing, supply chain optimization, predictive maintenance, and process automation tasks.
- TMT (Technology, Media, and Telecommunications): For tasks in digital media content management, telecommunication optimization, data analysis, and customer engagement.
- Others: If your industry does not fit into the predefined categories, you can select this option and provide more details to better align with your specific domain.
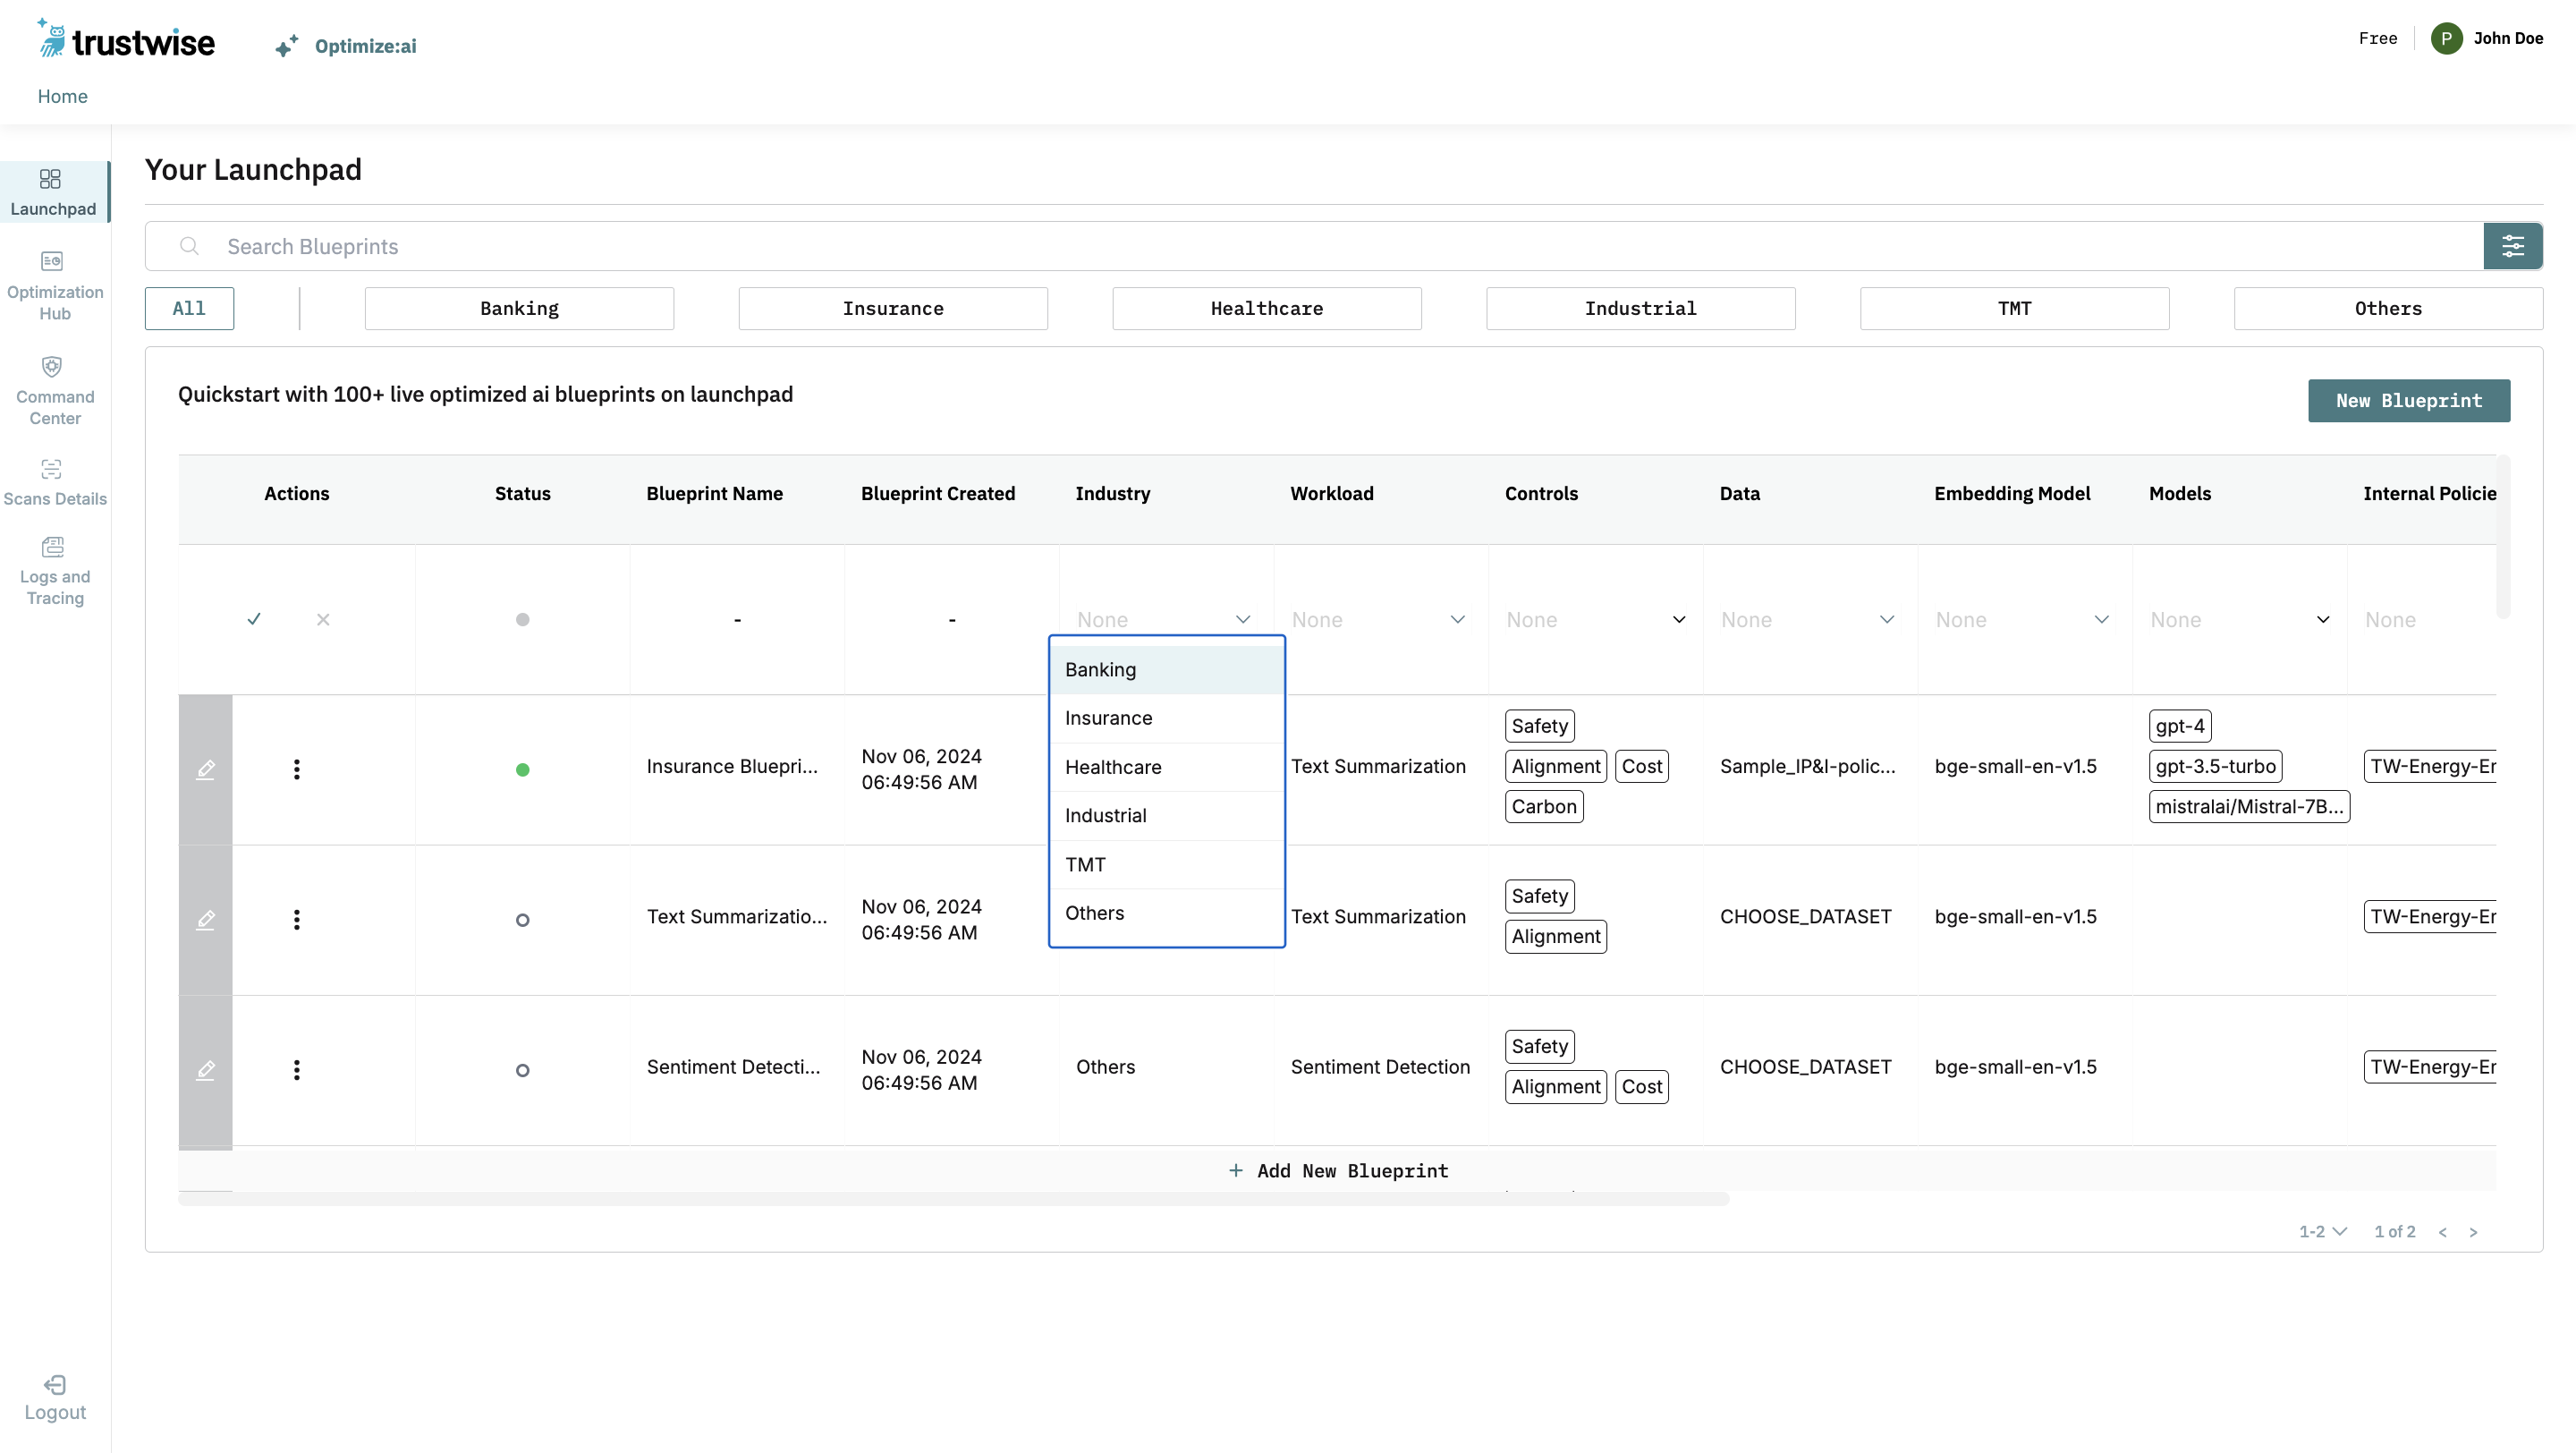
Workload
Choose the Workload type that represents the specific task for your LLM.
The available workload options include:
- Content Creation: Tasks related to generating text, such as articles, blogs, or other written content.
- Knowledge Extraction: Extracting key information from large data sets or documents.
- Text Summarization: Condensing lengthy text into concise summaries.
- Sentiment Detection: Analyzing text to determine the sentiment or emotional tone behind the words.
- User Recommendations: Providing personalized suggestions to users based on previous interactions or data.
- Language Conversion: Translating text between different languages.
- Personalization: Customizing content based on user preferences or behaviors.
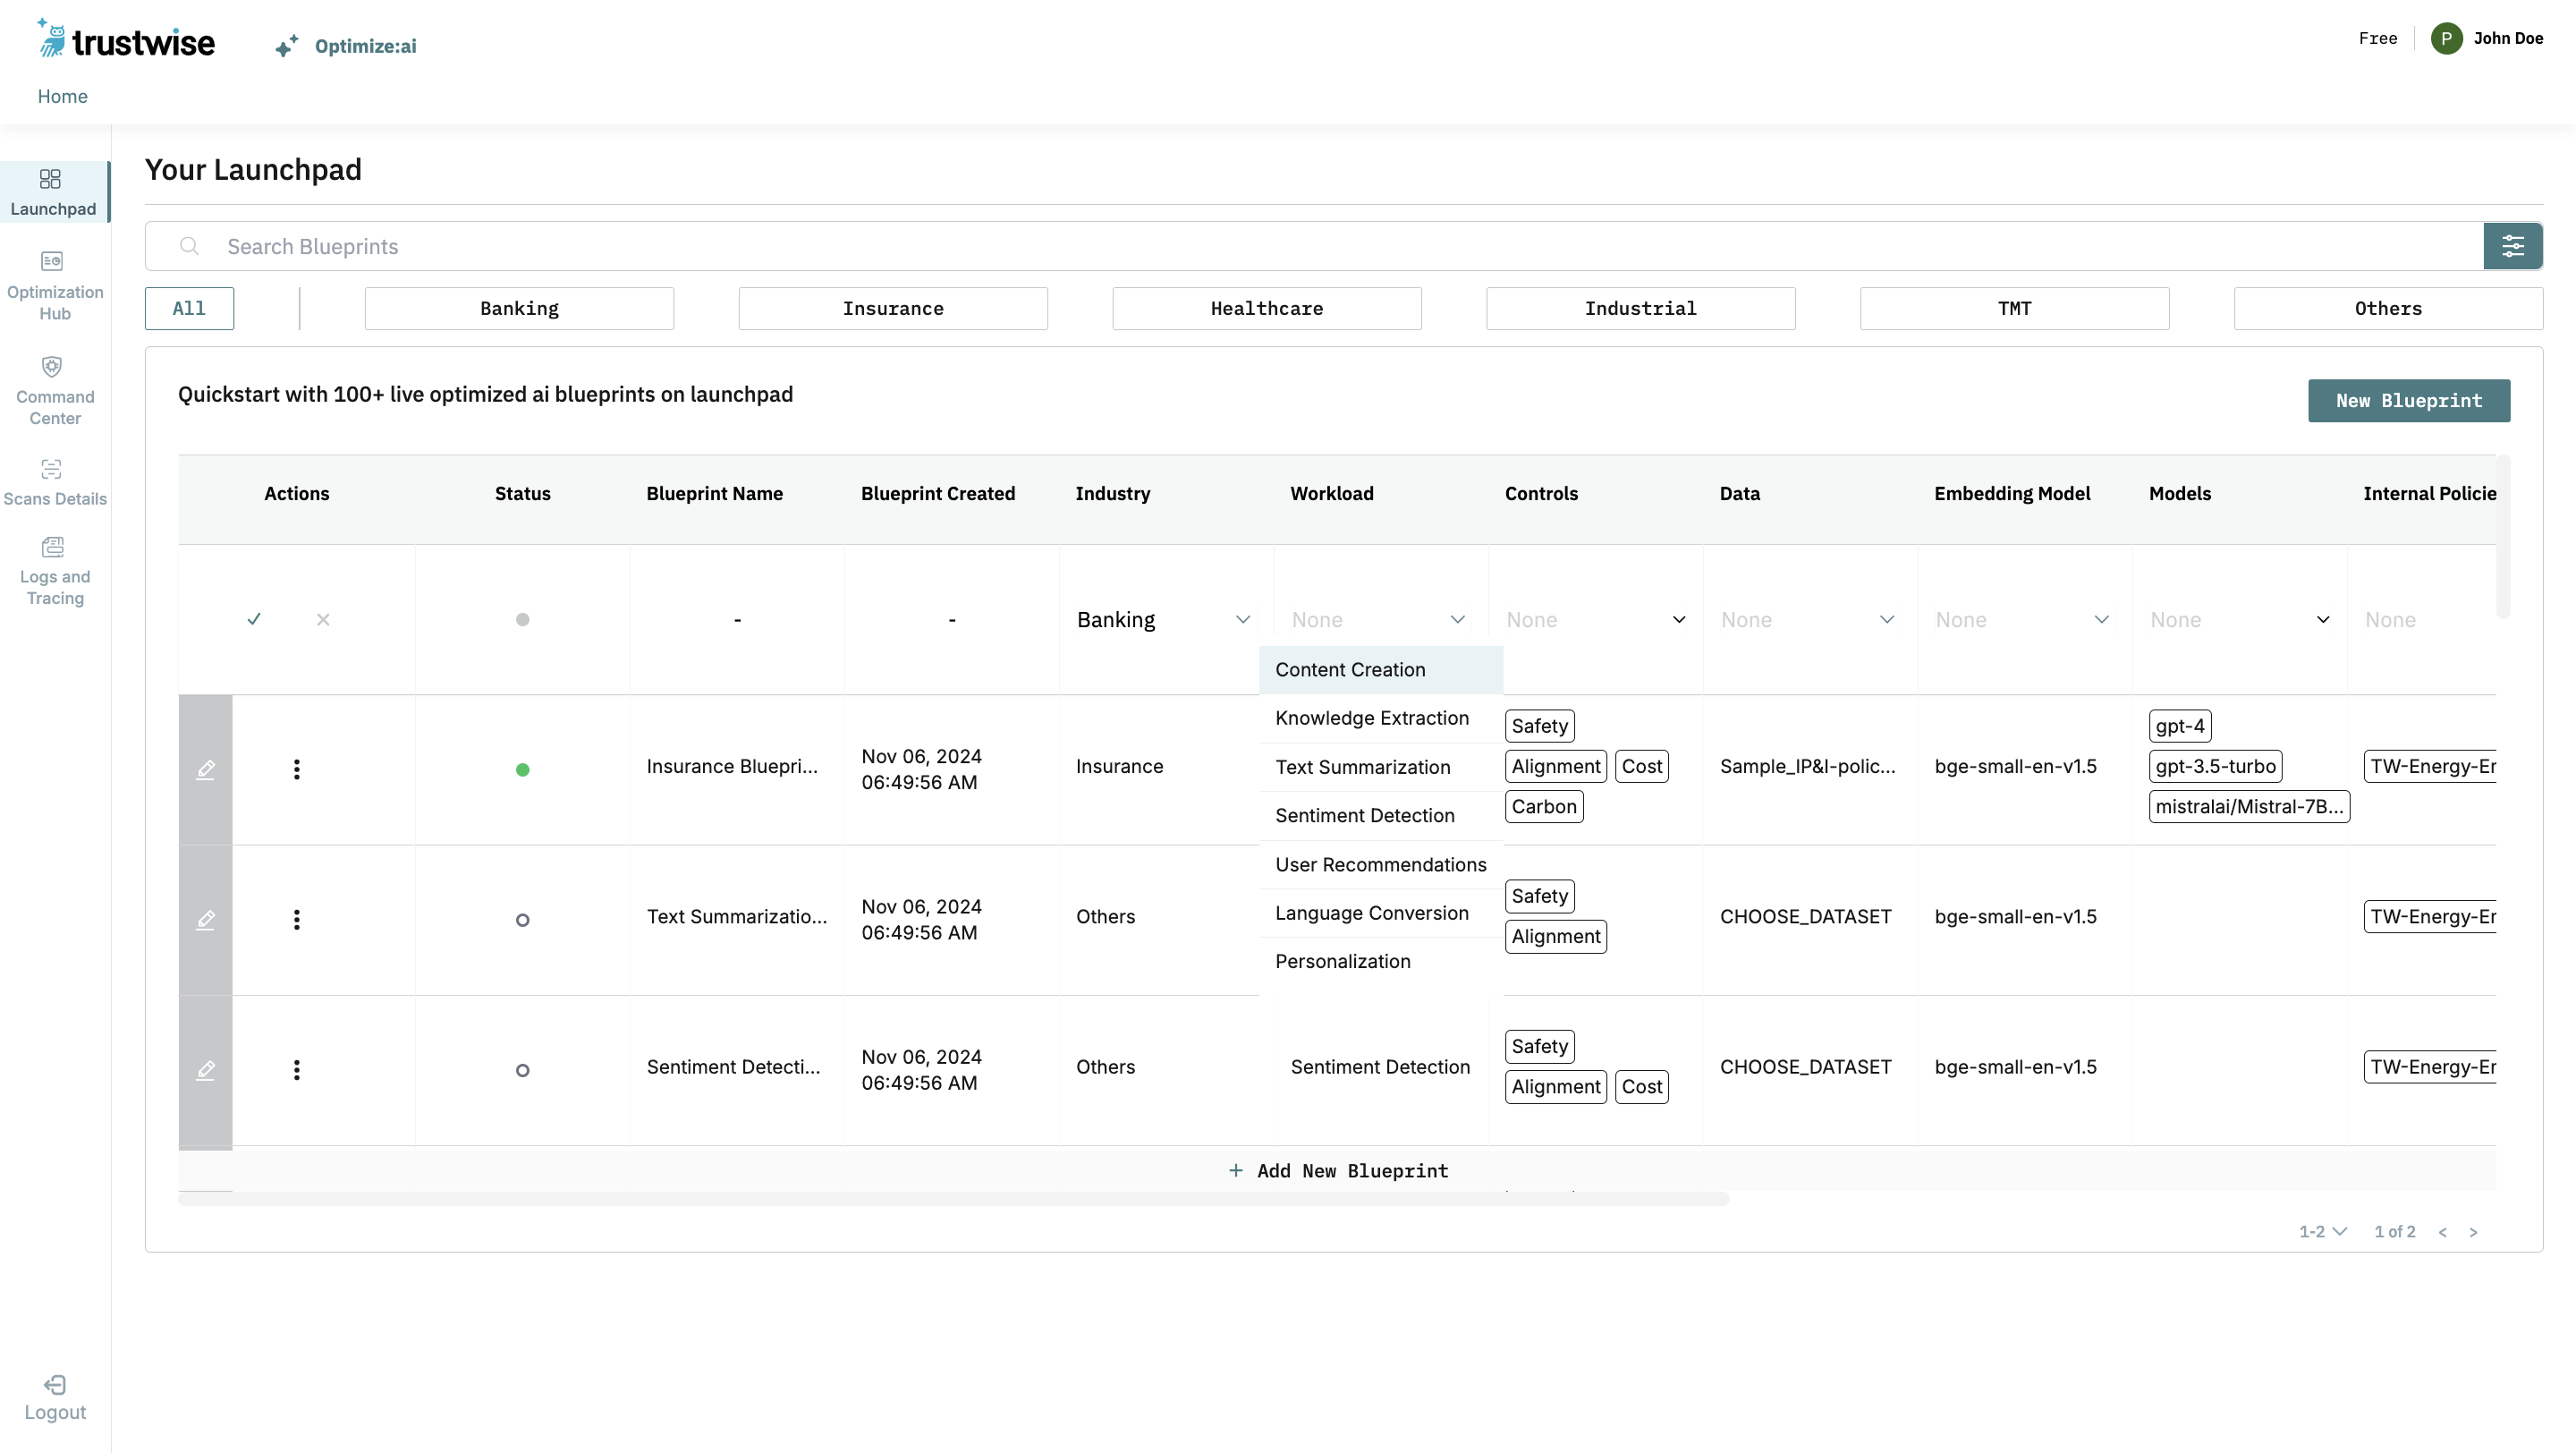
Controls
Select relevant Controls to manage the LLM’s performance. Multiple controls can be selected as needed.
The available control options include:
- Safety: Ensures the LLM operates within ethical and safety guidelines, minimizing harmful or unintended outputs.
- Alignment: Focuses on aligning the model's behavior with your desired outcomes and goals.
- Cost: Helps you monitor and control the financial cost associated with running your workload, ensuring efficiency.
- Carbon: Allows you to track and optimize the environmental impact (carbon footprint) of your workload.

Data
In the Data field, select the document you want to use from the drop-down list or upload a new document. For detailed instructions on how to upload a new dataset, please refer to Data Upload Instructions.

Embedding Model
Select an Embedding Model from available options.
Our providers include:
- OpenAI
- Text Embedding Inference (Hugging Face)
- Azure AI Foundry
For more details on registering your Embedding Models, refer to Embedding Model Registration Instructions.
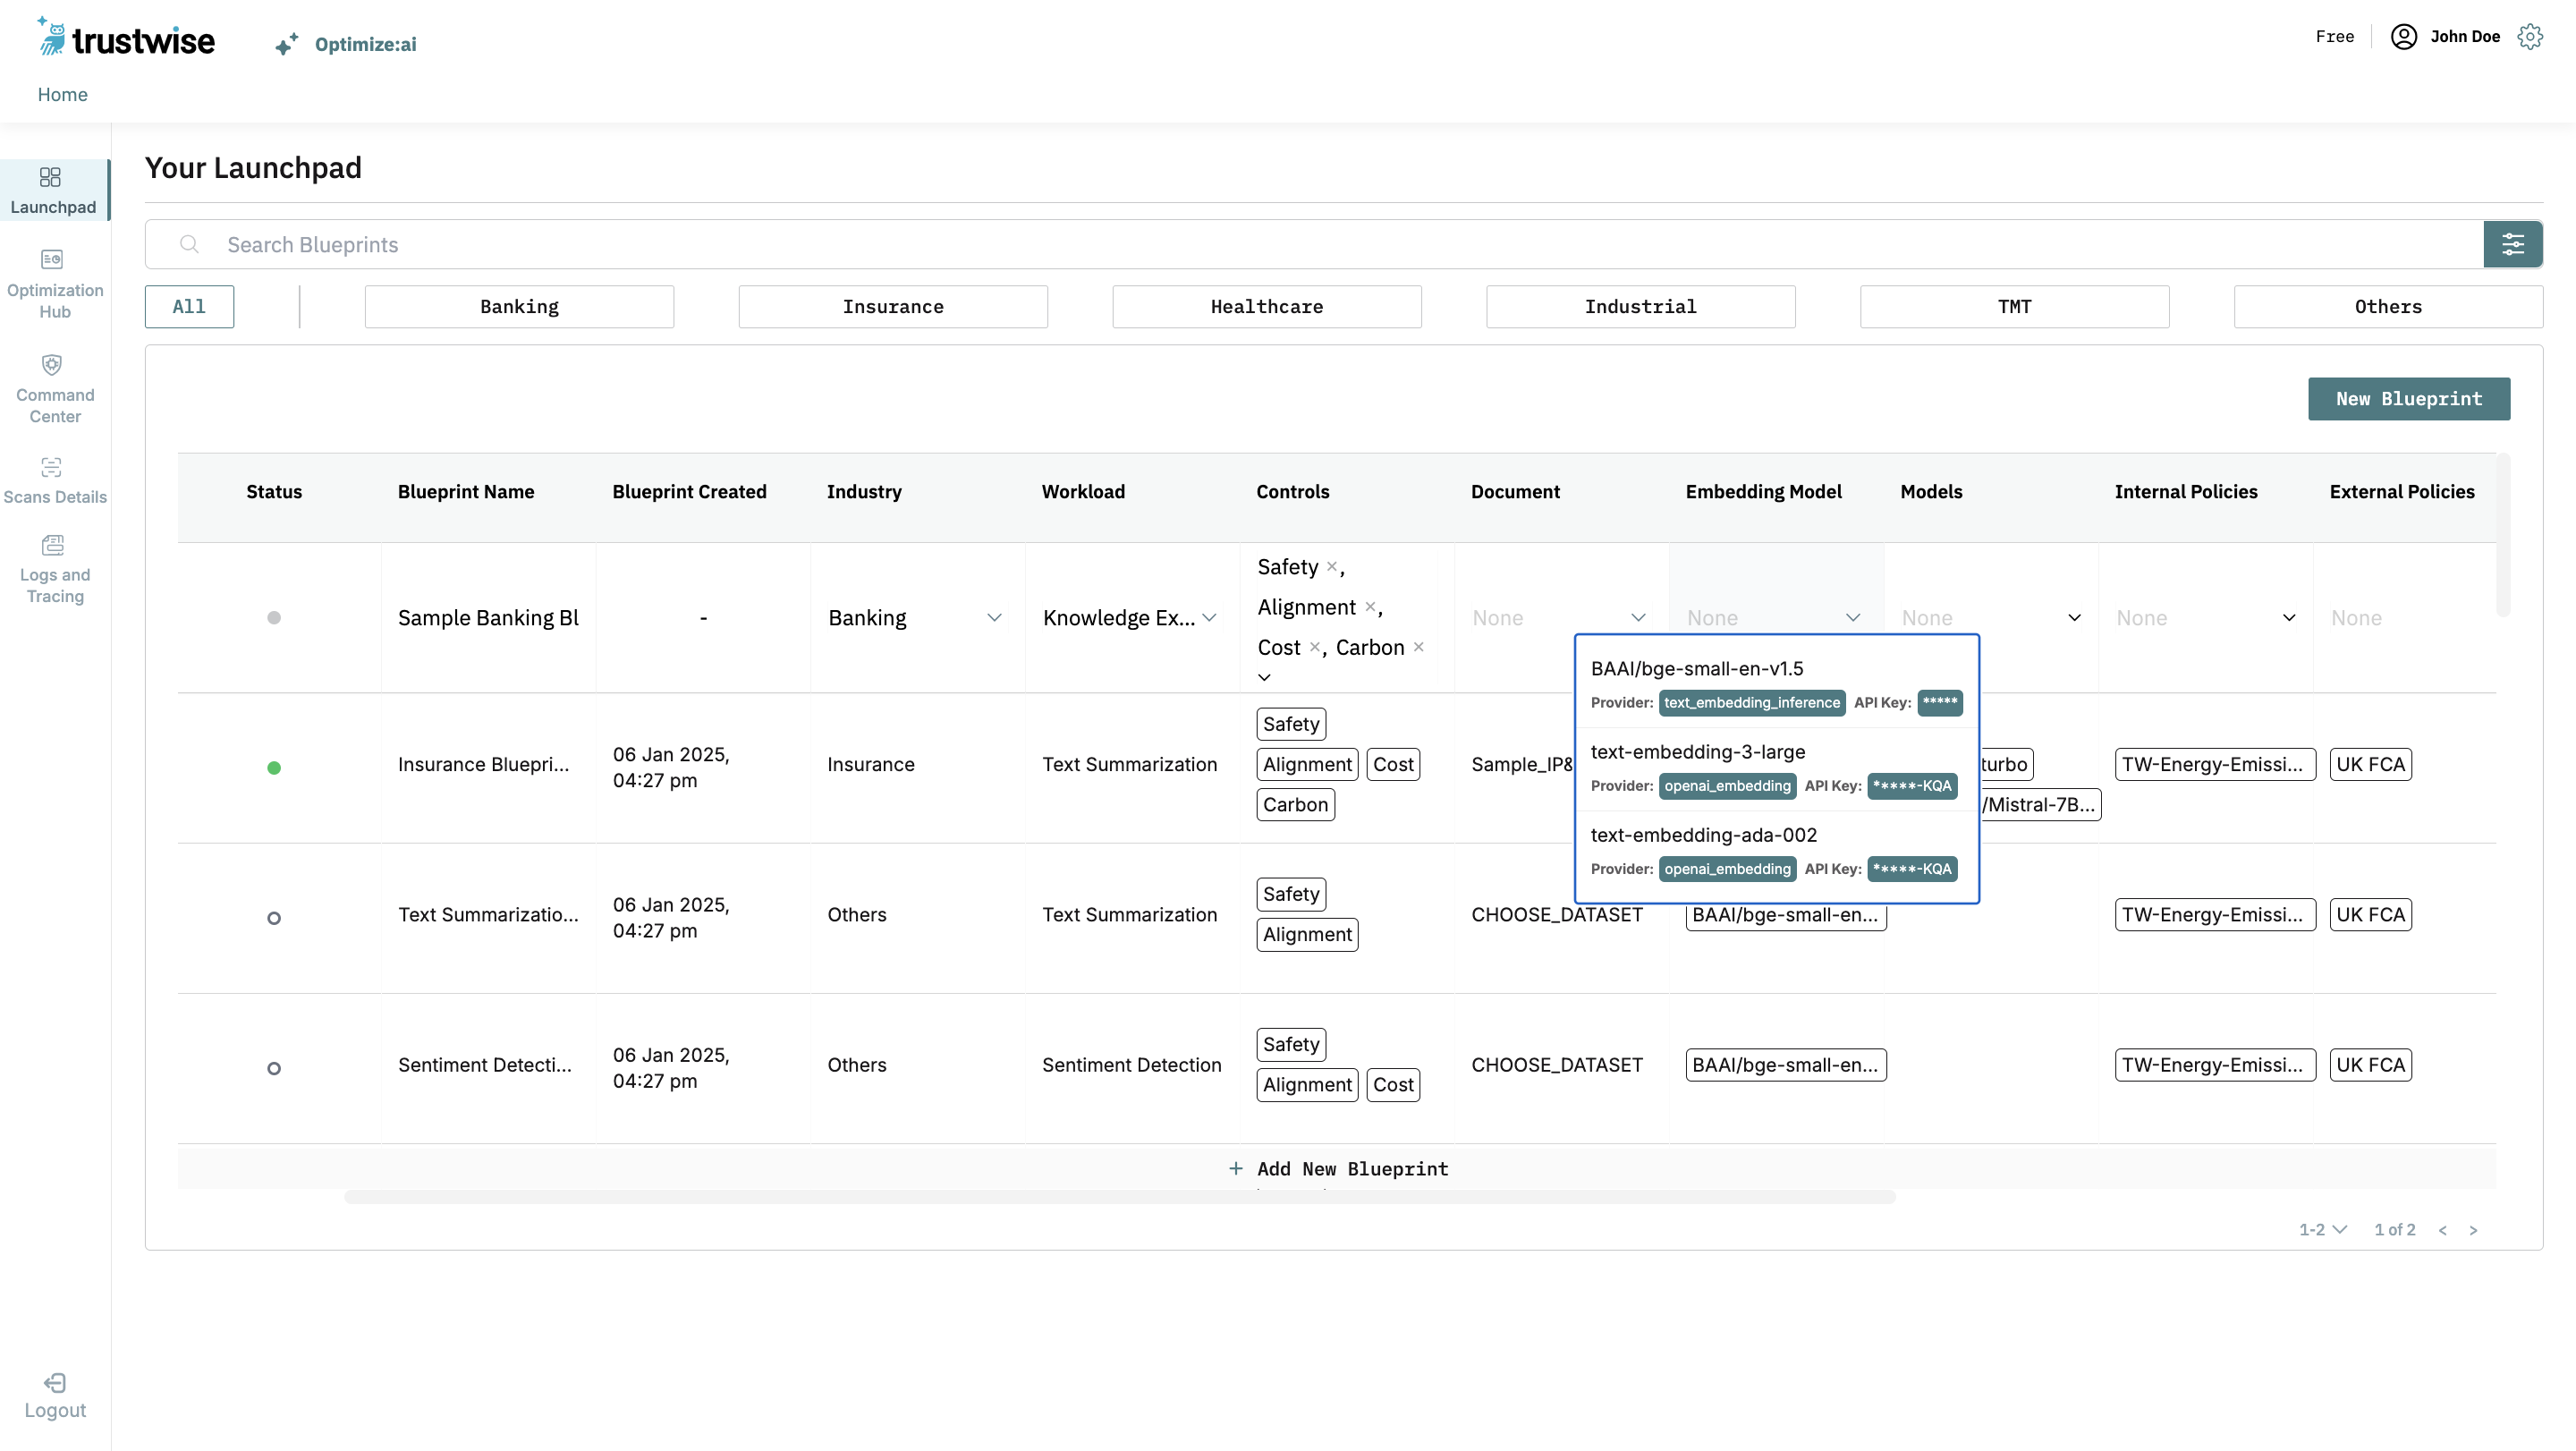
Note: As documents are embedded with specific embedding models, once a document is selected, the corresponding embedding model will be preselected. If you would like to use a different embedding model you will have to re-upload the document with desired the embedding model.
Models
Choose up to three registered LLMs from the available providers:
- OpenAI
- Together AI
- Hugging Face
- NVIDIA
- Azure AI Foundry
For more details on registering your LLMs, refer to LLM Registration Instructions.
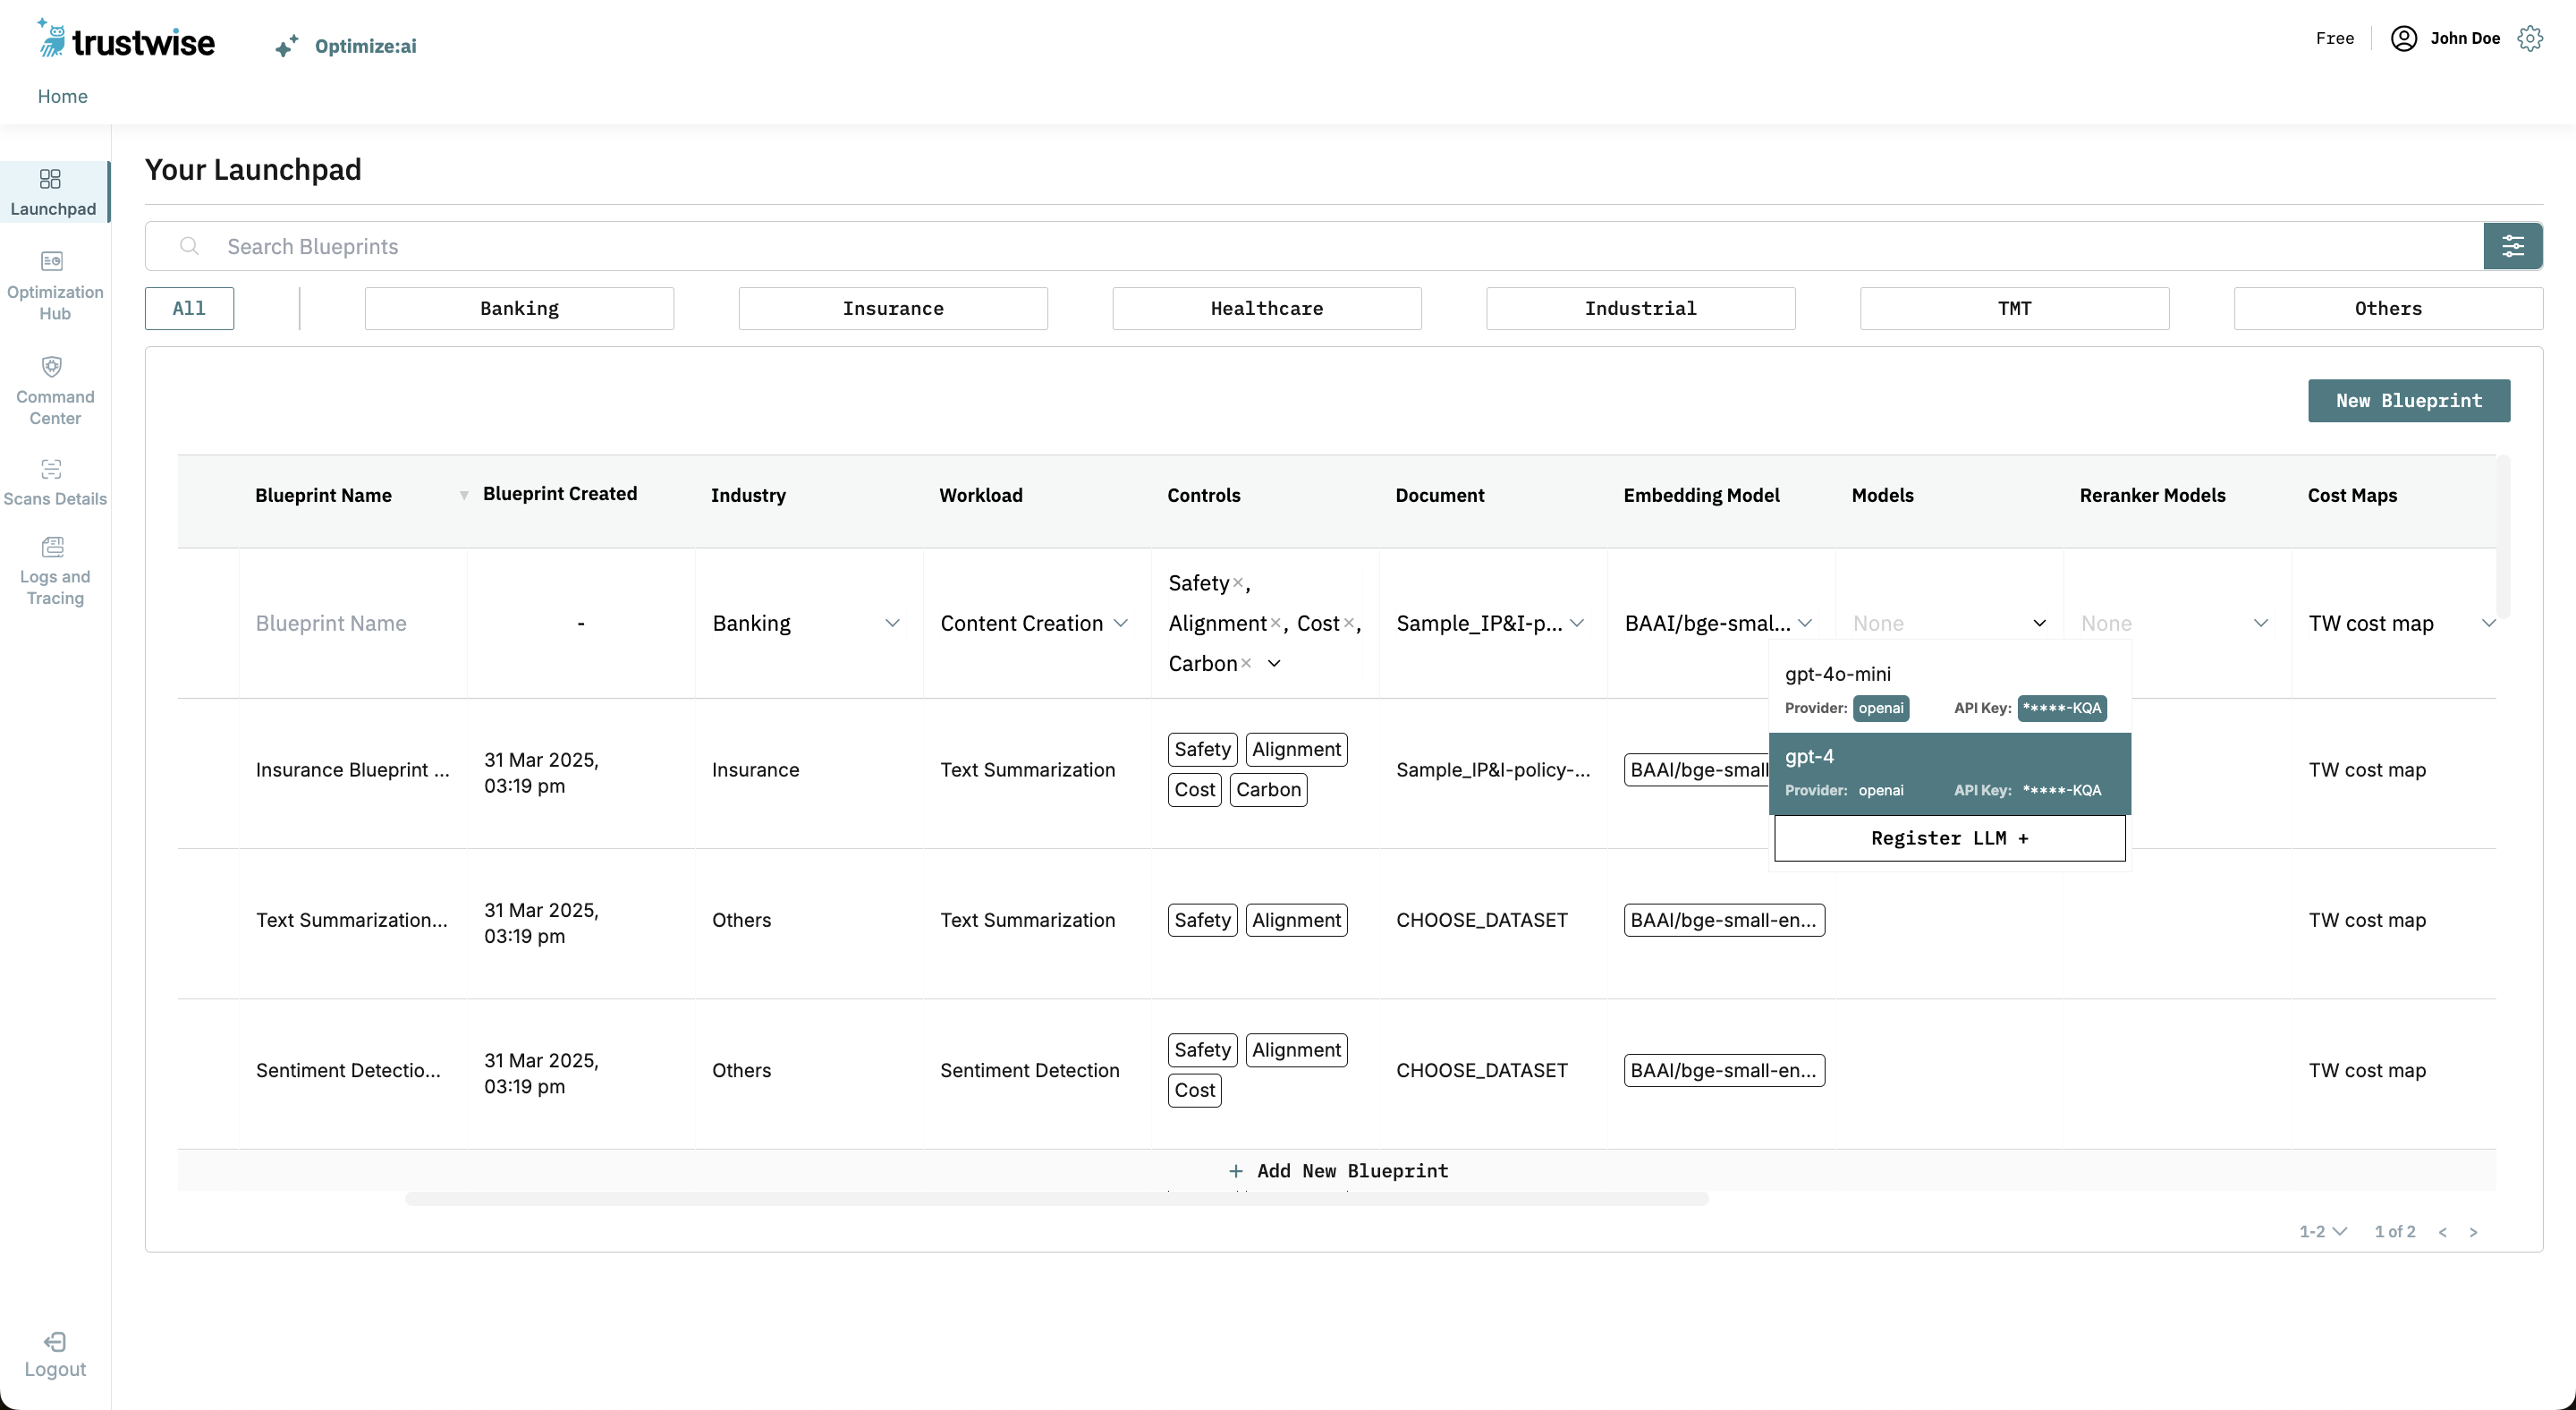
Note: When selecting multiple models, the first selected model is treated as the baseline and used for synthetic query generation (if applicable).
Reranker Models
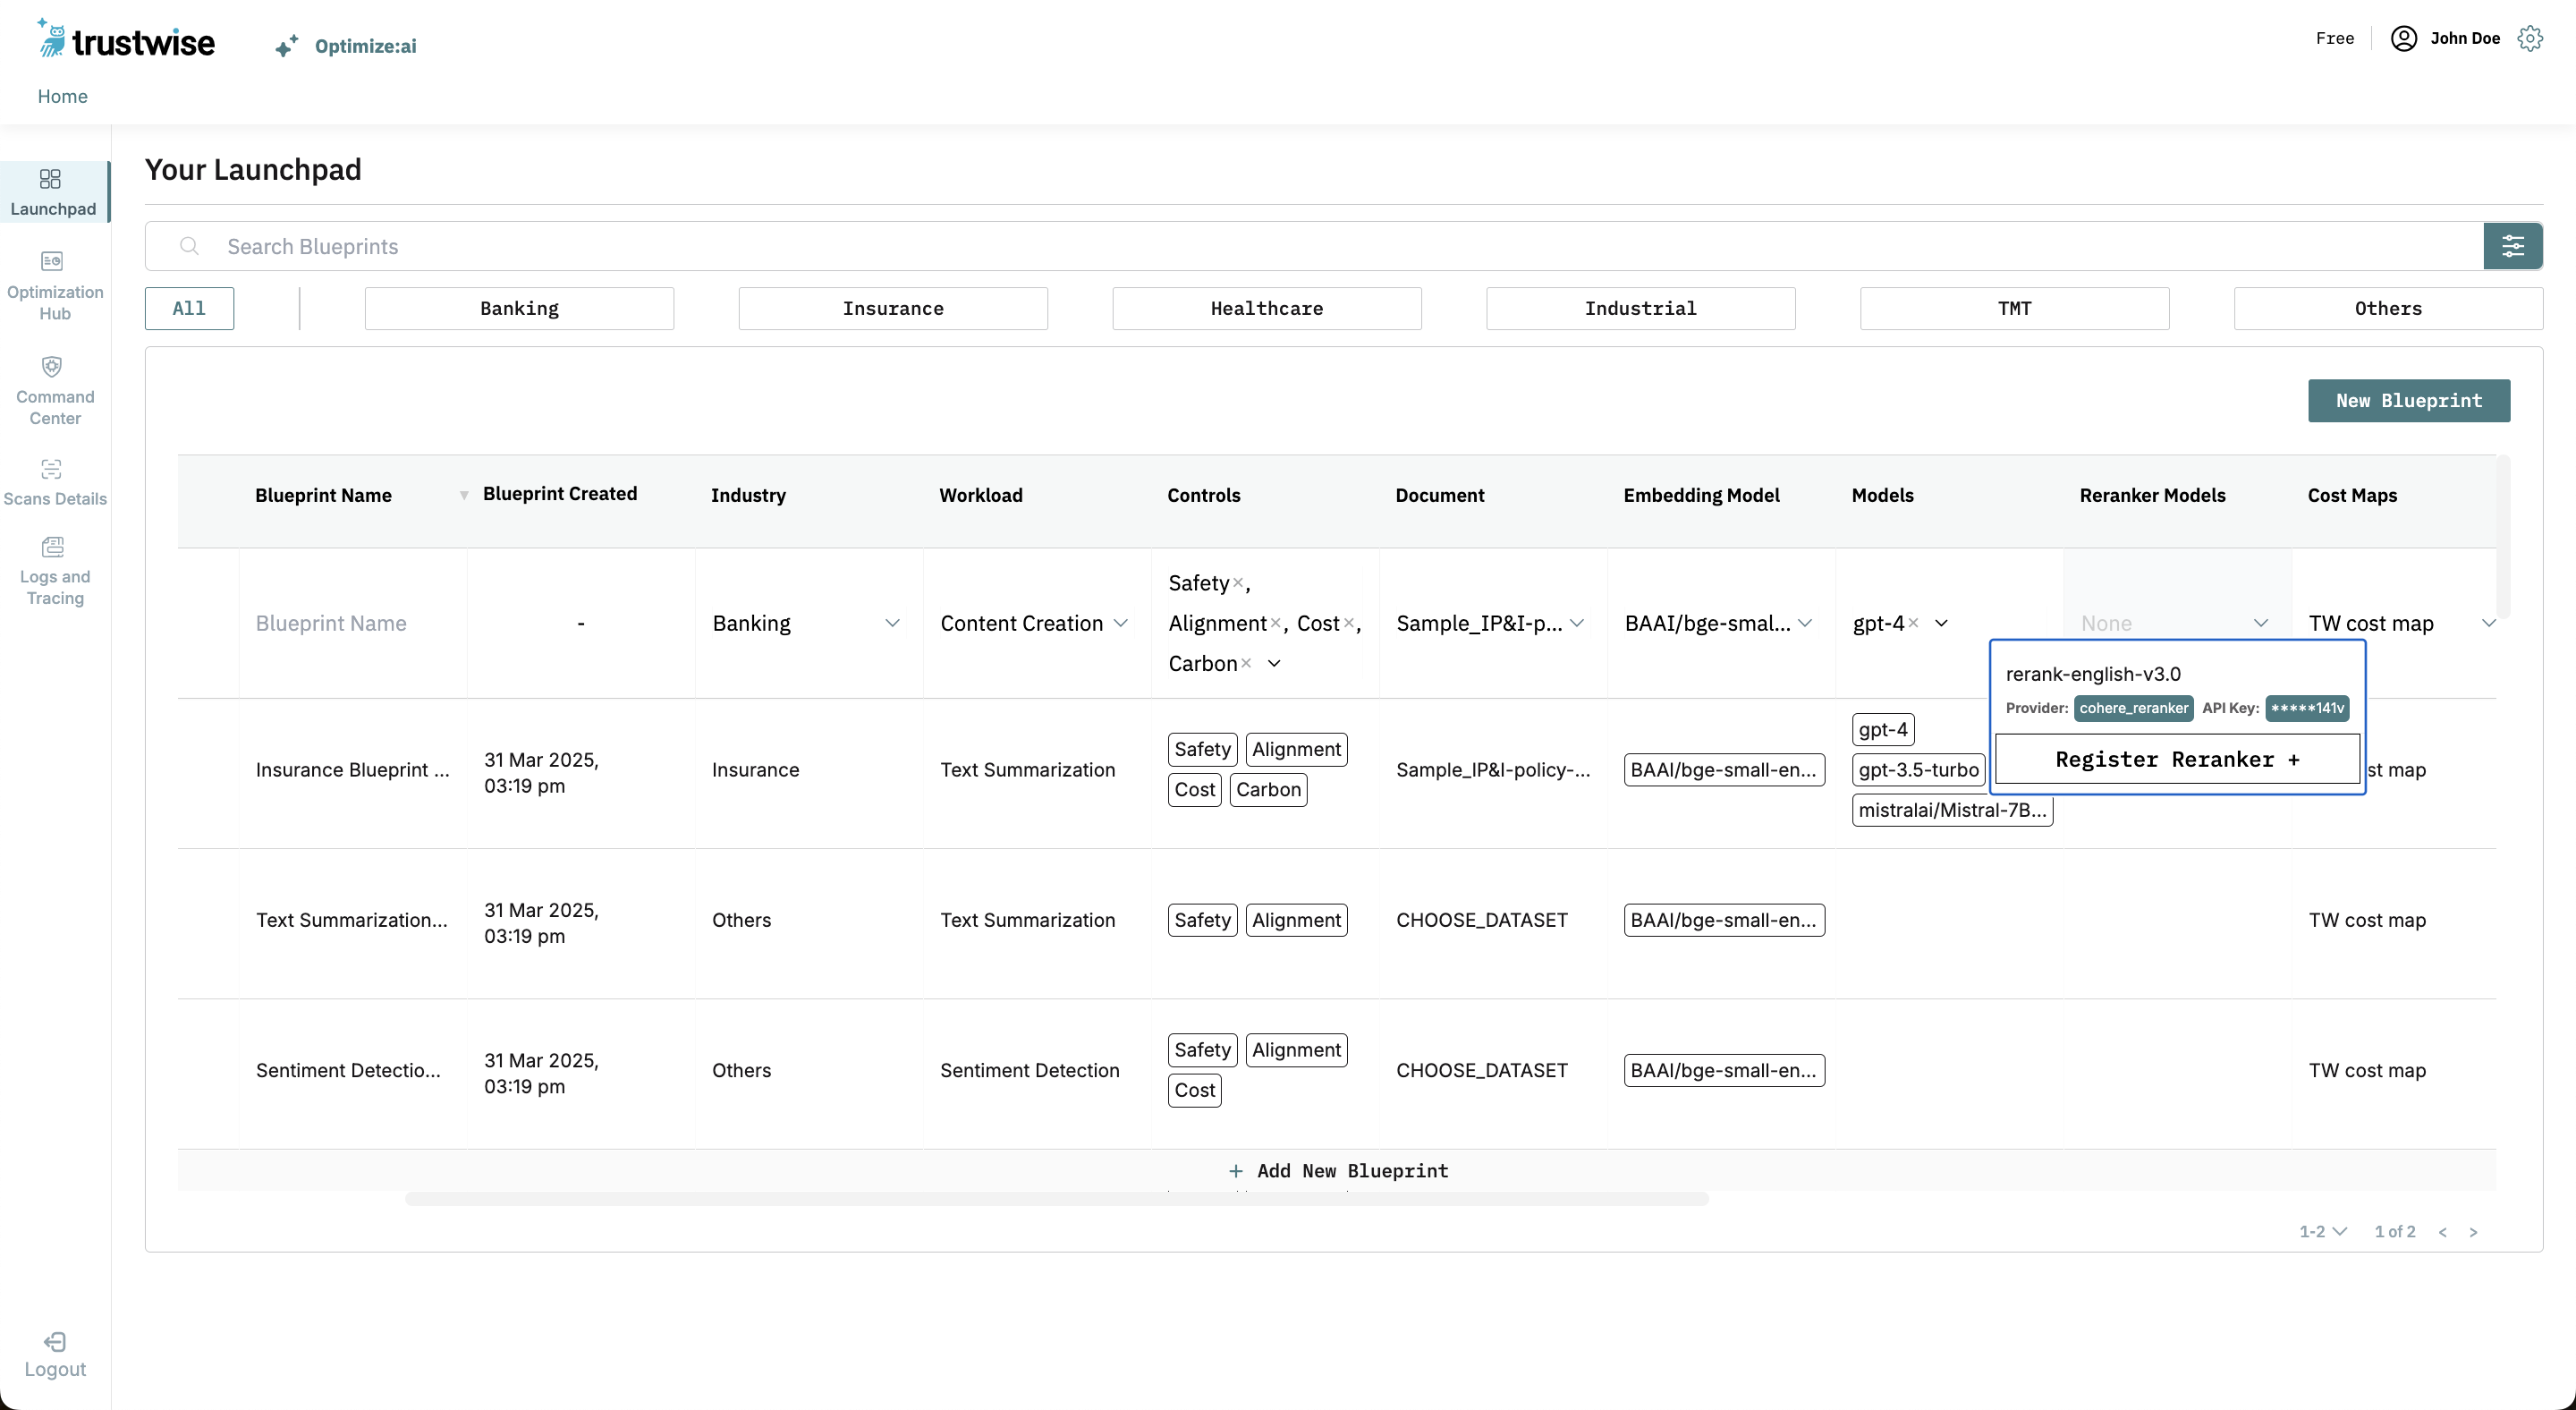
Select a Reranker Model from available options.
Our providers include:
- Cohere
- Together AI
- Azure AI Foundry
For more details on registering your Reranker Models, refer to Reranker Model Registration Instructions.
Cost and Carbon Maps
Select Cost and Carbon maps to monitor and manage energy consumption.
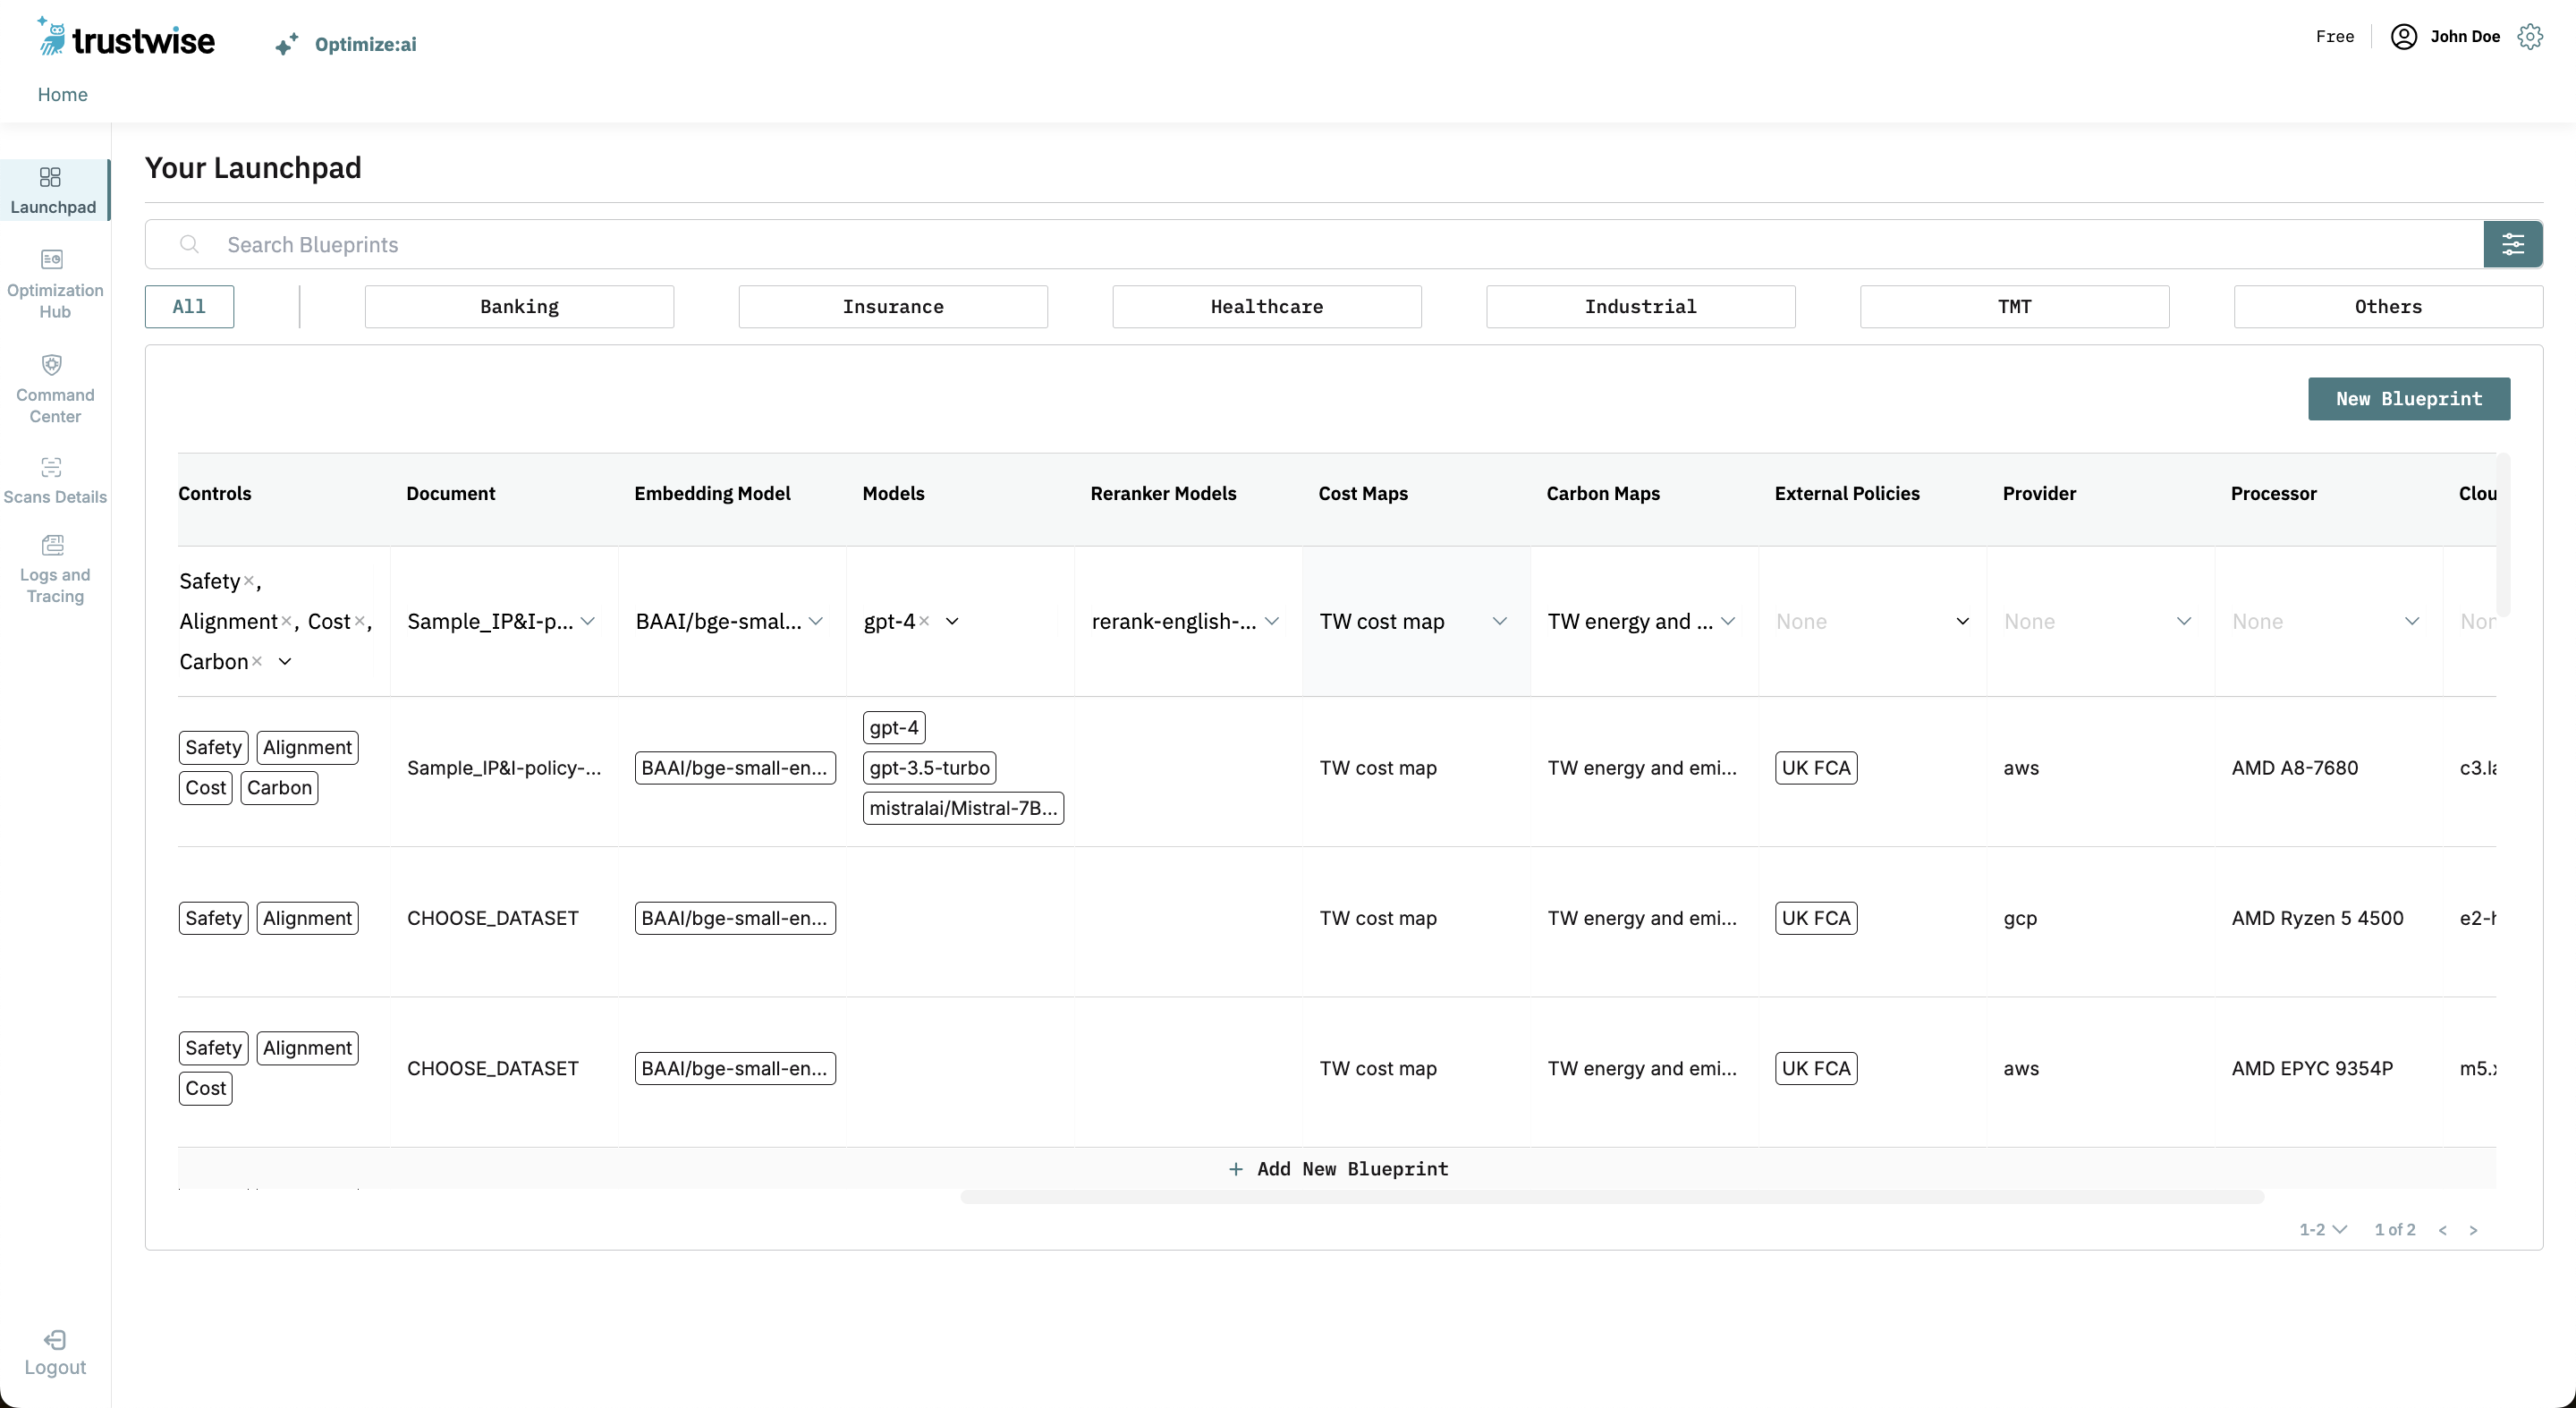
Note: When cost and/or carbon controls are selected, TW cost map and TW energy and emissions map will be automatically presected.
External Policies
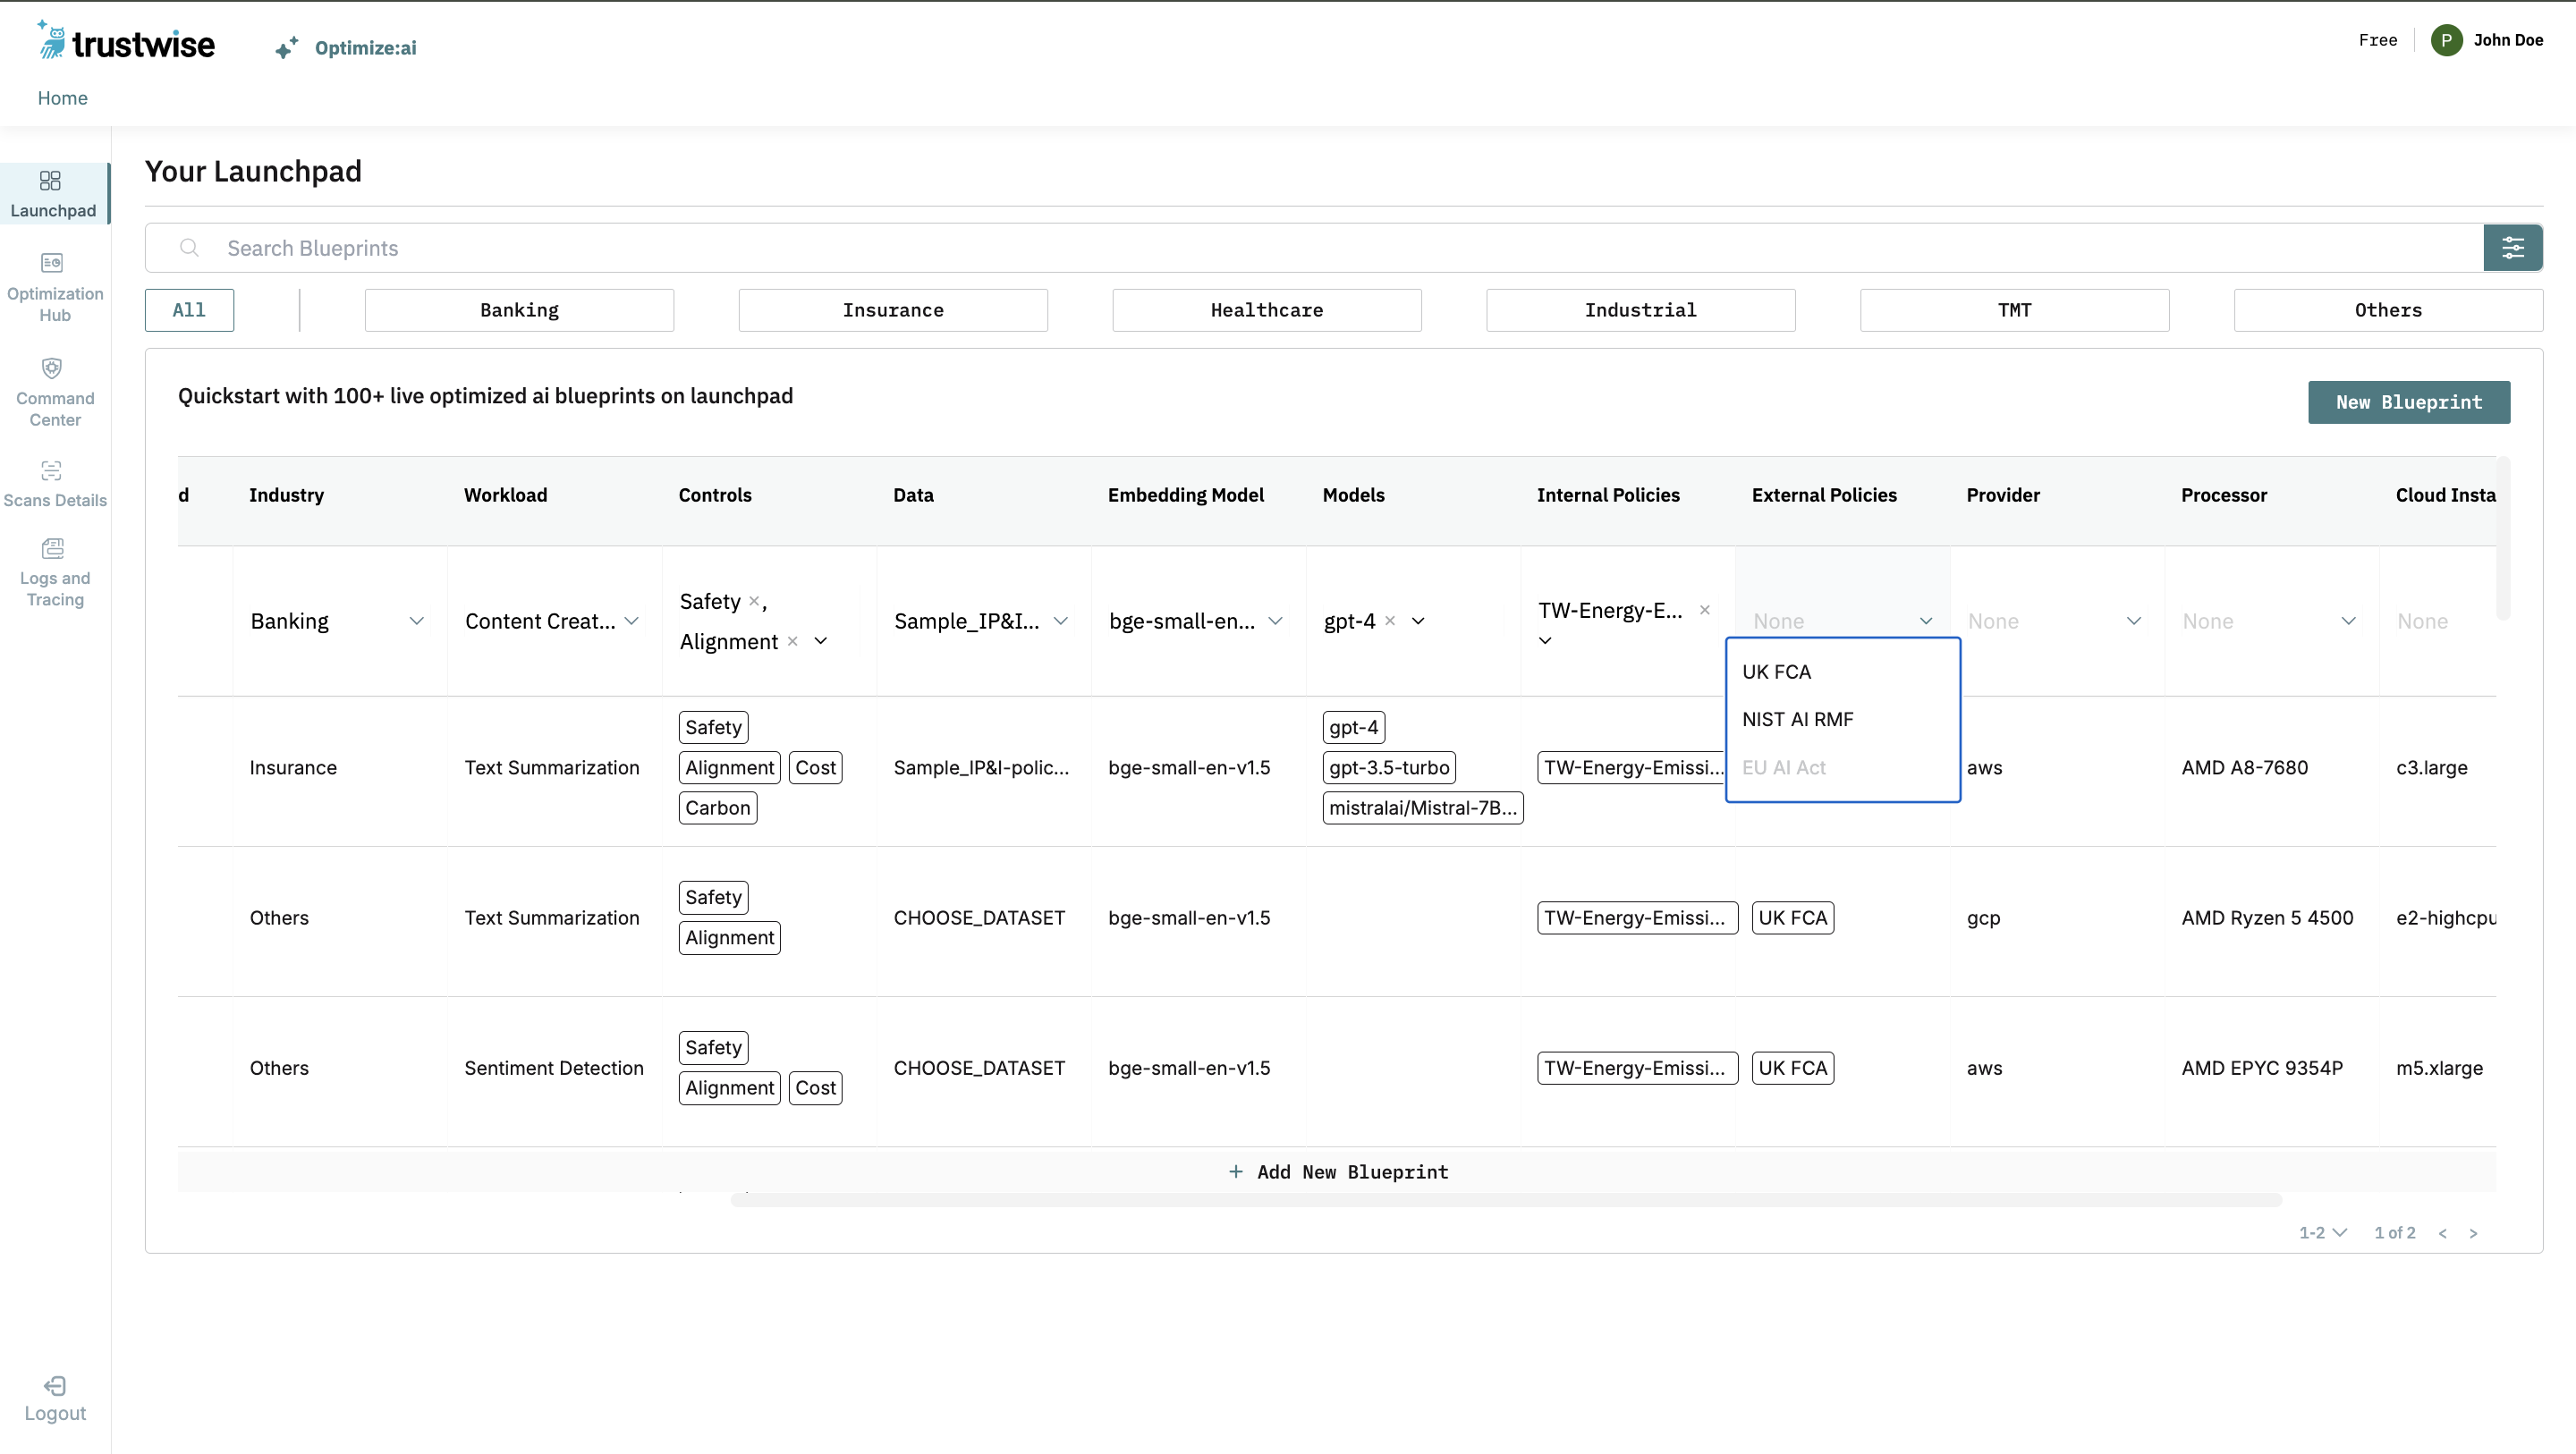
Select an appropriate External Policy for regulatory compliance:
The available external policy options include:
- UK FCA: Compliance with UK's Financial Conduct Authority. This ensures compliance with financial regulations, including consumer protection, best practices in financial transactions, and reporting.
- NIST AI RMF: Adheres to the National Institute of Standards and Technology (NIST) AI Risk Management Framework. This policy focuses on the ethical and responsible use of AI, covering risk identification, assessment, and mitigation strategies.
- EU AI Act (Coming Soon): Aligns with the European Union's Artificial Intelligence Act, which establishes a legal framework for AI development and deployment within the EU, focusing on safety, transparency, and human rights protection.
Provider
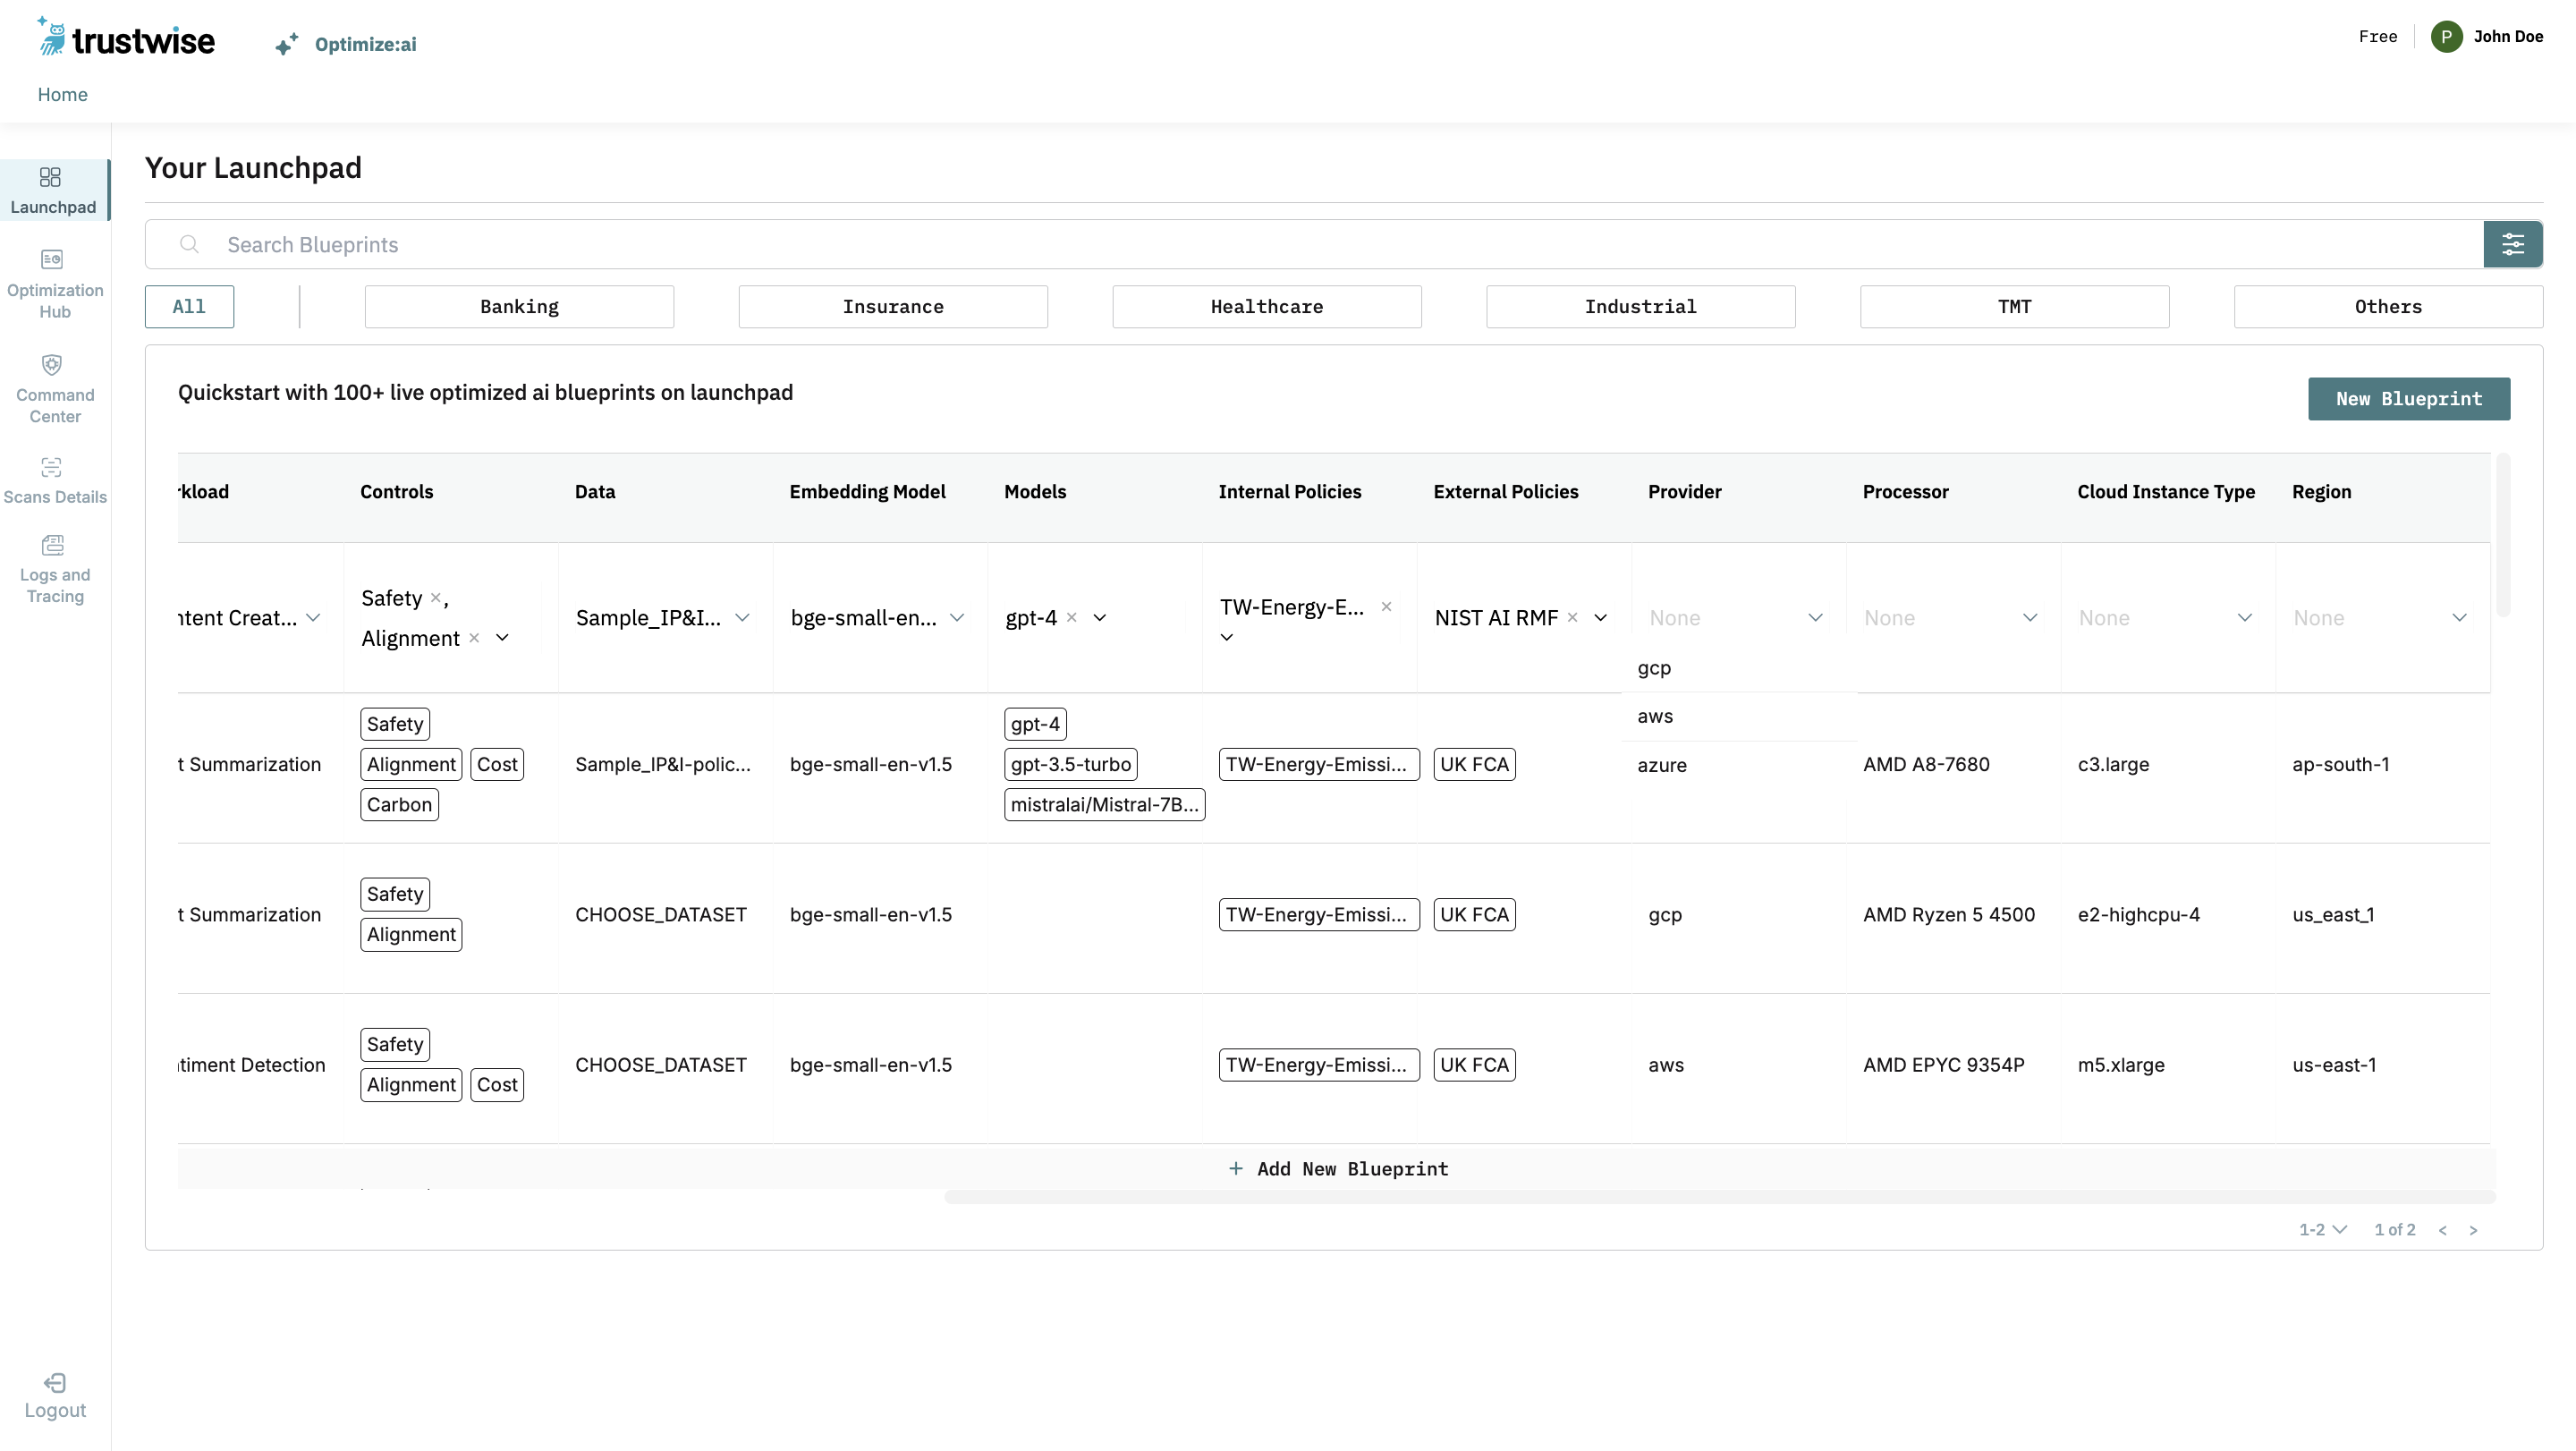
In the Provider field, select the cloud service provider you wish to use. The available options are AWS, GCP, and Azure.
Processor, Cloud Instance Type, and Region
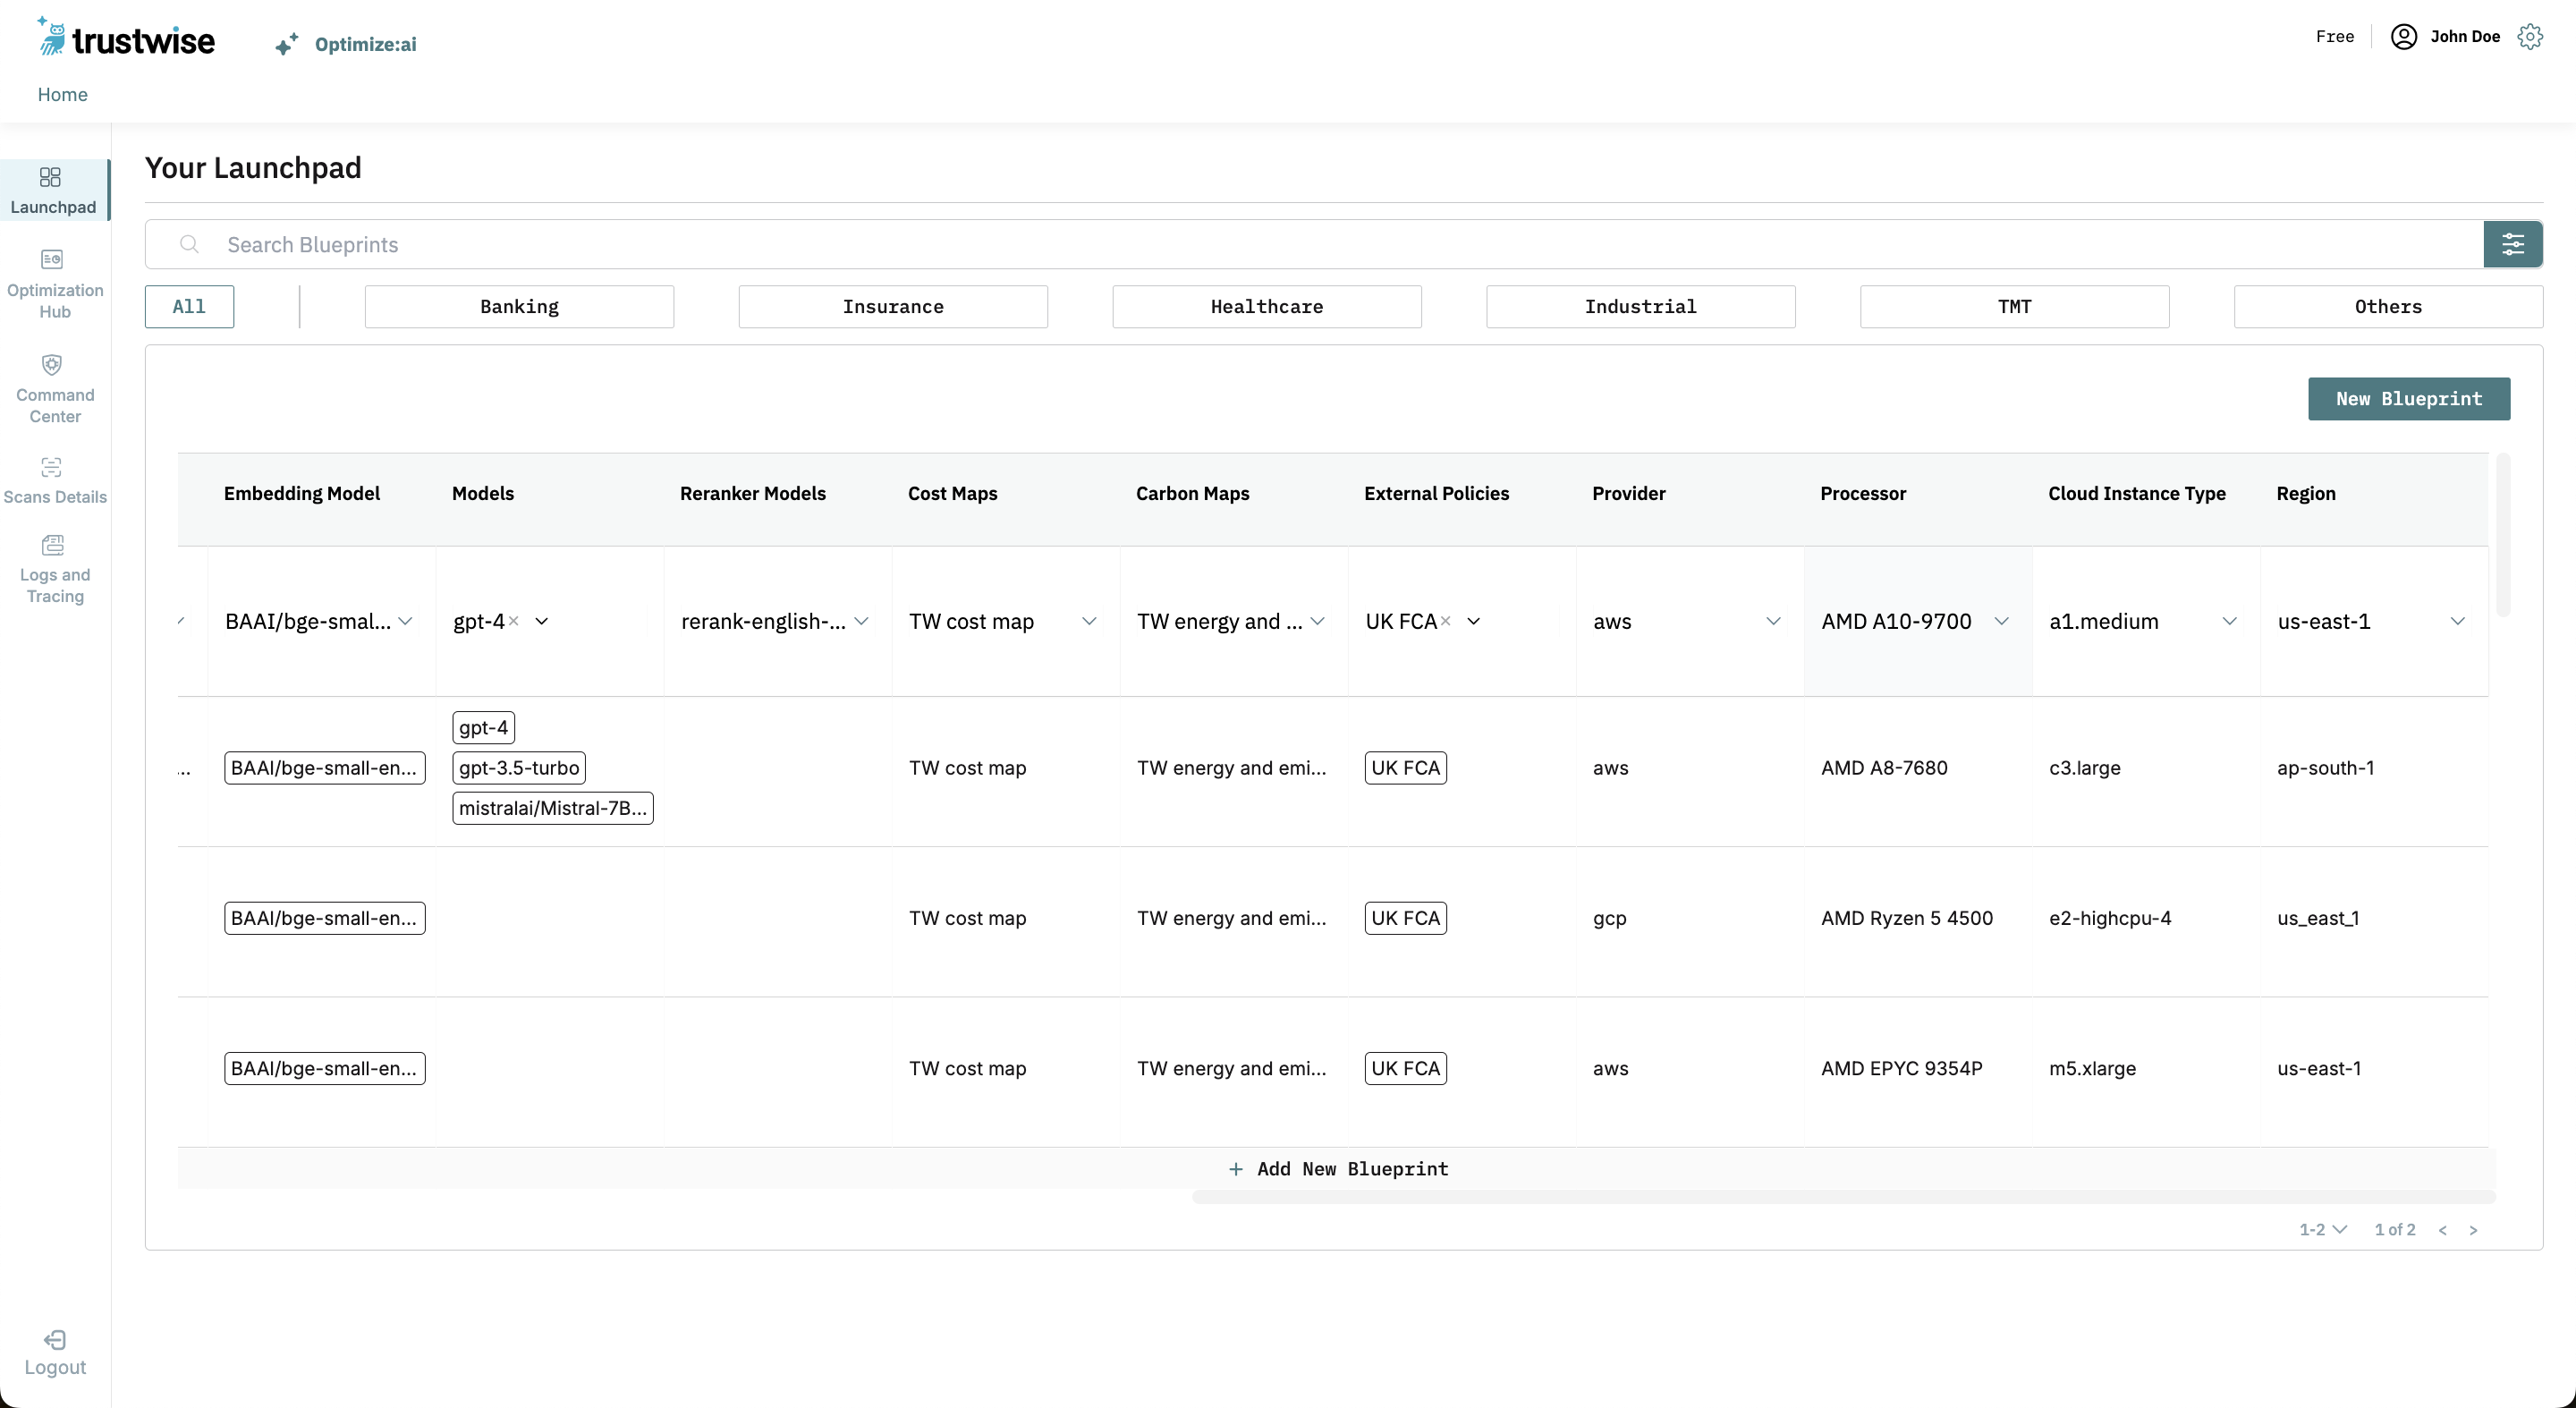
The Processor, Cloud Instance Type, and Region fields are generated based on your selected cloud provider. Choose the options that best match your project's requirements.
Step 3: Use a Blueprint to Run an Optimize:ai scan
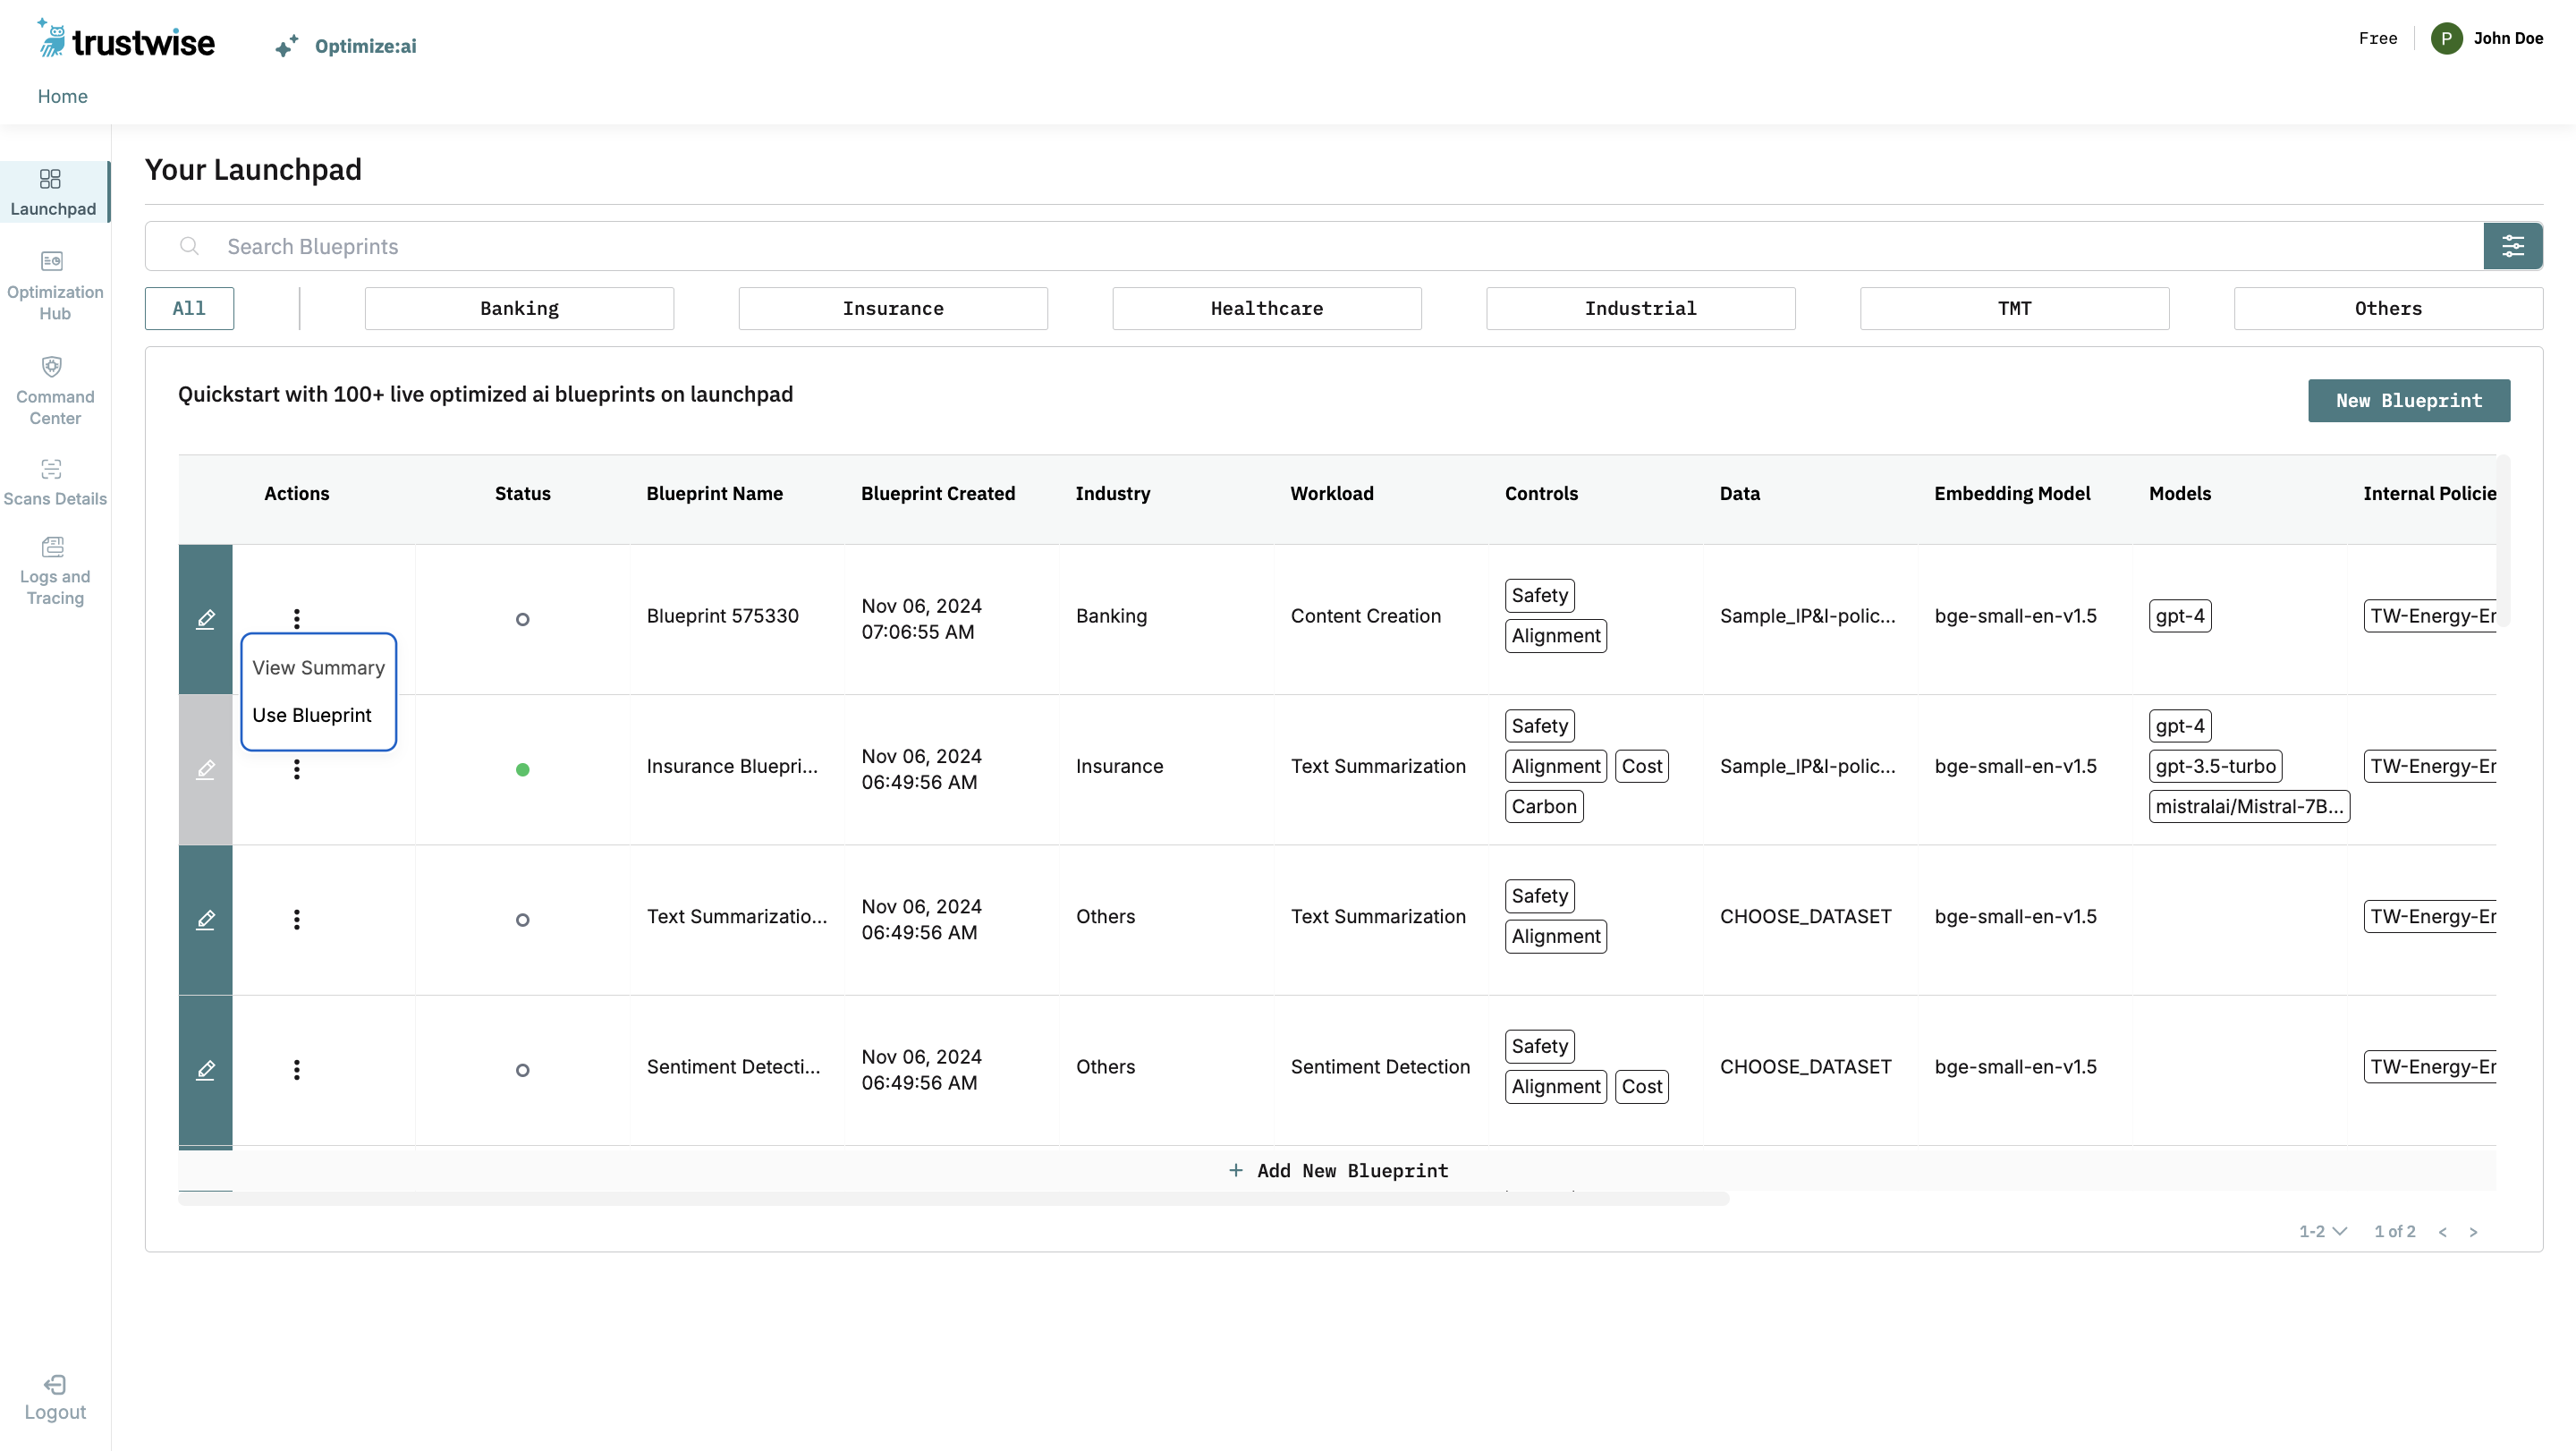
To run a blueprint, navigate to the Launchpad in the top-left corner of the screen. There you can click on the ellipsis button (three dots) under the actions column and then select Use Blueprint to run it. This will direct you to the pre-filled Optimization Hub screen with your blueprint details, where you can add your queries or edit any fields. Once everything is set, submit your scan and wait for it to complete. You can view the results in the Command Center.
Viewing and Editing blueprints
Viewing Blueprints
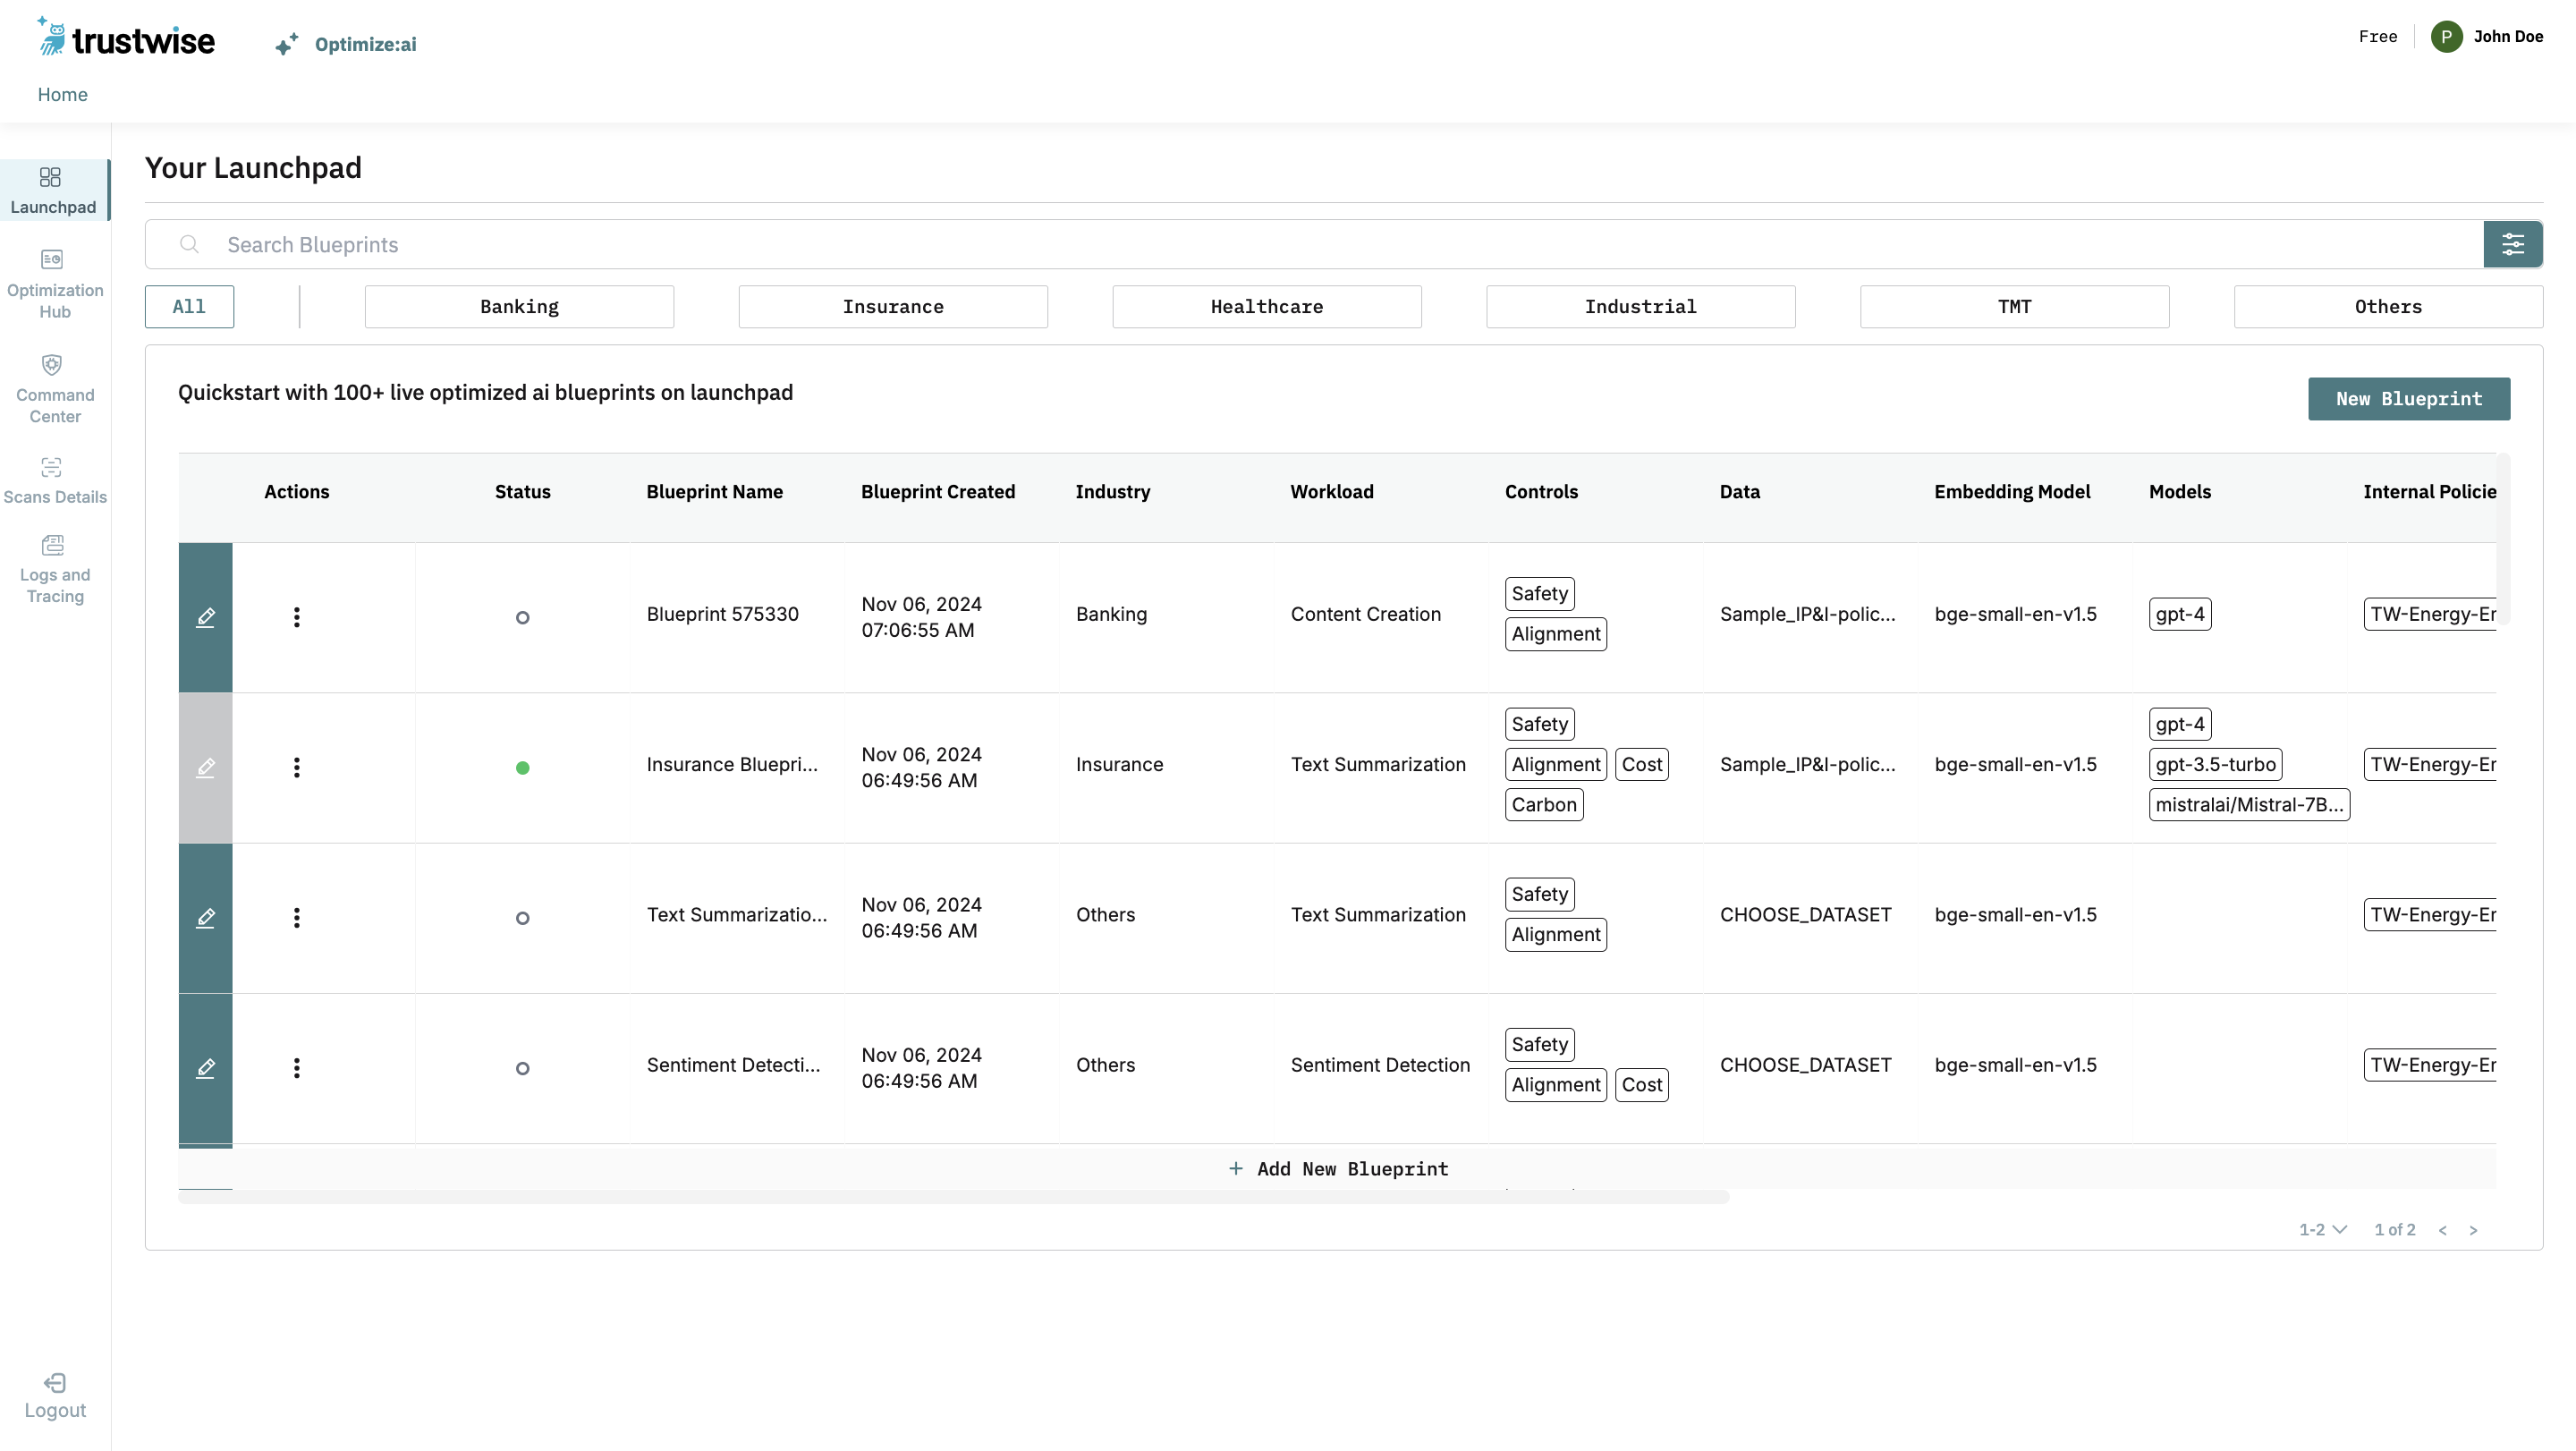
After a blueprint is created, it can be viewed directly on the launchpad screen. You can also use the search bar, labeled Search Blueprint, to find a specific blueprint.
Search and Filtering Blueprints
You can search for a blueprint using the search bar, which searches over all fields in the blueprint. Alternatively, you can filter by specific fields in ascending or descending order, such as created date, workload, data, model, and controls.

Status of Blueprints
In the Status field, different colored dots indicate the progress of the scan:
- White: No scan has been run for the blueprint.
- Blue: The scan has been created and is queued.
- Yellow: The scan is currently in progress.
- Green: The scan is completed successfully and ready to generate reports.
- Red: The scan was not able to be completed.
Editing Blueprints
To modify an existing blueprint, navigate to the desired entry on the launchpad interface. Click on the pencil icon at the very left of the blueprint's row. This will open the editable fields for you to modify. To alter a specific attribute, select the dropdown arrow adjacent to that field and choose the appropriate option from the menu that appears.

Additional Information
For assistance or more detailed instructions on managing your blueprints, please refer to our user guide or contact our support team at help@trustwise.ai.